
Grow Borage in Pots: Edible Flowers for Urban Gardens
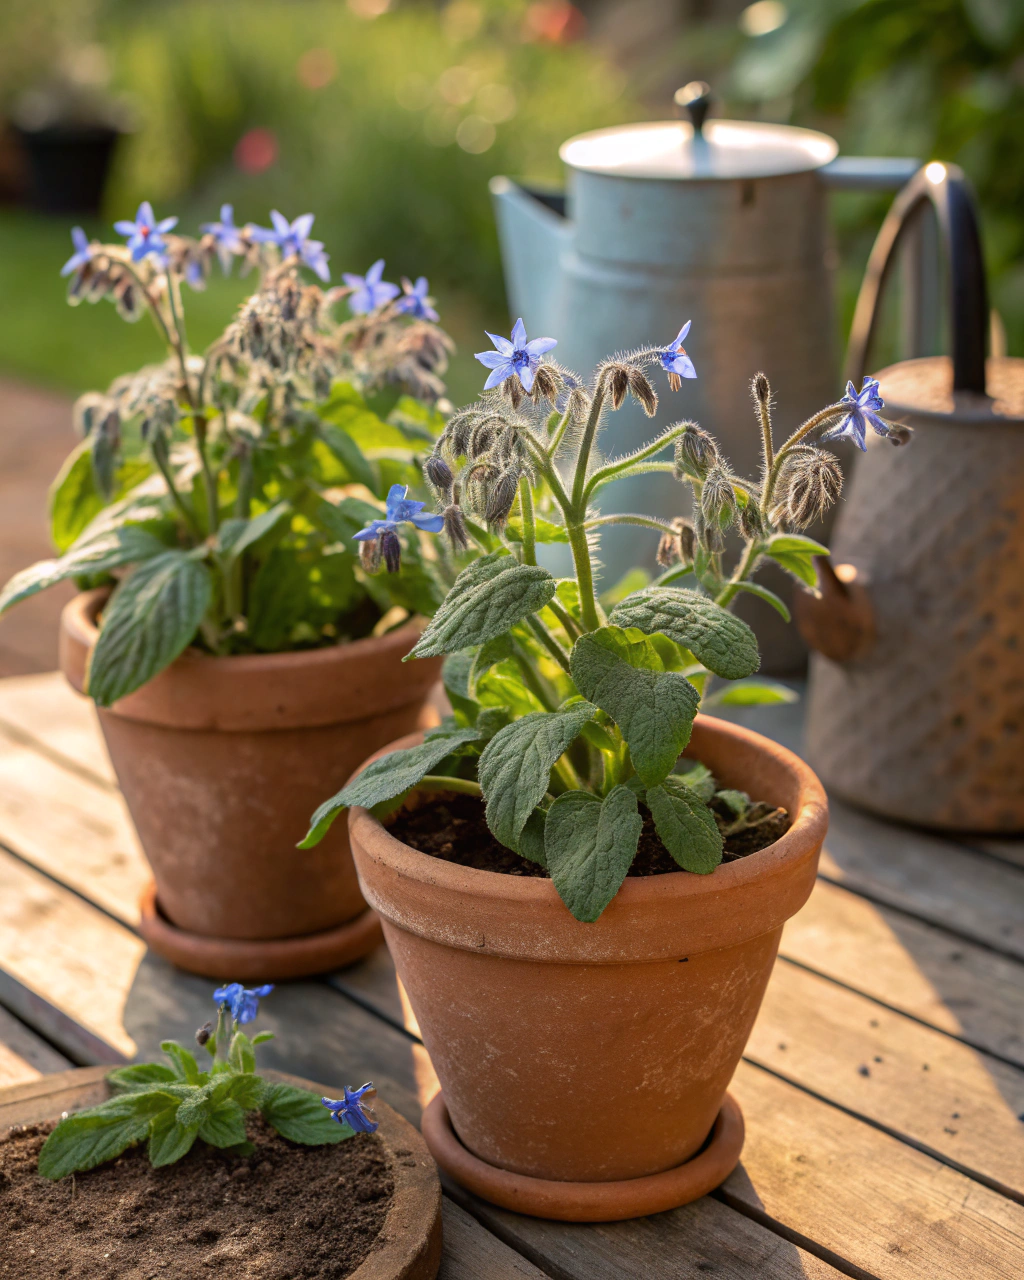
Borage is a delightful addition to any urban garden, especially in pots. Not only does it offer stunning, star-shaped blue flowers that add a splash of color, but its edible blooms bring a fresh, cucumber-like flavor directly to your table. You don’t need a sprawling garden bed—or even much space—to enjoy borage’s beauty and benefits. Whether you have a cozy balcony or a small patio, growing borage in pots is entirely doable. I’m here to walk you through clear, practical steps that save you frustration and guarantee success. You’ll learn how to handle common issues like limited space, soil quality, and pests while enjoying fresh, home-grown borage flowers in just a few months.
Getting Ready — What You’ll Need
Before starting, gather these essentials to set up your potted borage for a healthy life:
- Container: Choose pots at least 30 cm (12 inches) deep and 25 cm (10 inches) wide to provide ample root space. Clay or terracotta pots work well to regulate temperature (clay pots help keep roots cooler in hot climates), but plastic is fine if it has good drainage.
- Drainage: Make sure your pot has several drainage holes to prevent soggy roots—a fatal mistake for borage.
- Soil: Use a well-draining mix combining 70% loamy soil, 20% compost, and 10% coarse sand or perlite. This provides nutrients and aeration without waterlogging.
- Seeds: Look for organic or untreated seeds, or varieties like ‘Common Borage’ which thrive easily indoors. If you want a compact option for balconies, ‘Dwarf Borage’ is an excellent choice.
- Fertilizer: Select a balanced liquid fertilizer with low nitrogen and slightly higher phosphorus and potassium (e.g., 5-10-10 NPK) to encourage flowering.
(Organic fish emulsion or seaweed-based feed works well.) - Tools: Trowel, watering can with a fine rose, small hand fork, and a pair of scissors for harvesting flowers.
- Location: A spot with at least 6–8 hours of direct sunlight daily, like a balcony ledge or sunny window sill.
Step-by-Step — How to Grow in Pots
1. Preparing Your Pot
Start by thoroughly cleaning your pot to remove old soil, pests, or diseases—this prevents early problems. Layer the bottom with about 2–3 cm (1 inch) of broken pottery shards, gravel, or coarse sand to create a drainage layer. This stops water from pooling around the roots and causing rot. Then, fill the pot with your prepared soil mix until it’s about 3 cm (1 inch) below the rim. Press the soil lightly so it’s firm but not compacted—imagine squeezing a wrung-out sponge. Soil that’s too dense suffocates roots, while too loose won’t support seedlings.
Watch out: Never skip drainage holes or compact soil tightly; your borage will suffer.
2. Sowing or Planting
Borage seeds are fairly large and easy to handle. Before sowing, you can soak them for 4–6 hours in lukewarm water to speed germination, but this is optional. Plant the seeds at a shallow depth of 0.5–1 cm (¼ inch), spaced about 10 cm (4 inches) apart if sowing multiple seeds in one pot. If you’re transplanting seedlings, leave the same spacing. The ideal temperature for germination is between 15–20°C (59–68°F). After sowing, gently mist the soil until moist.
You’ll know you’ve done it right when the tiny green shoots push through the soil surface within 7–14 days. The soil should feel moist but not soggy—like a wrung-out sponge. If it looks cracked or dry, water lightly immediately.
Pro tip: Cover your pot with a clear plastic bag or dome until germination to retain humidity. Just remember to remove it once seedlings appear to prevent fungal issues.
3. Watering and Sunlight
Borage loves moisture, but its roots hate waterlogging. Water your plants deeply until you see moisture draining from the pot’s base. This usually means watering 2–3 times per week during warm weather. Check the top 2 cm (¾ inch) of soil before watering—if it feels dry, it’s time to water. In cooler or cloudy weather, reduce frequency but do not allow the soil to completely dry out; borage is sensitive to drought.
For locations exposed to wind or intense heat, group pots together to create a mini microclimate, which helps retain humidity. Mulching the soil surface with straw or shredded leaves can also reduce water loss.
Borage thrives with 6–8 hours of direct sunlight daily. If you live in a cloudy region or an apartment with filtered light, place the pot in the sunniest spot possible or consider supplemental grow lights for 4–6 hours daily. Remember, without enough light, your plants will be leggy and produce fewer flowers.
4. Feeding and Maintenance
From about 3 weeks after sowing, feed your borage every 3–4 weeks with a diluted liquid fertilizer. Stick to formulas with a higher phosphorus (middle number) to encourage abundant blue blooms, but avoid high nitrogen formulas—they encourage leafy growth at the expense of flowers.
Keep an eye on crowded or leggy seedlings and thin to maintain an average of 10 cm (4 inches) spacing. This ensures good air circulation and optimizes root space. Regularly loosen the soil surface gently with a hand fork to improve aeration.
Inspect leaves for signs of nutrient problems, such as pale or yellowing foliage, which often indicates deficiency or overwatering. Adjust care before symptoms worsen. As I always say, “The secret is not more work — it’s regular care and observation.”
5. Troubleshooting While They Grow
Even with care, you might face issues. Here’s how to tackle some common ones:
- Yellow leaves: Often caused by excess nitrogen. Switch to a fertilizer with higher phosphorus or add compost tea to balance nutrients.
- Stunted growth: Usually lack of light or poor soil aeration. Move your pot to a sunnier spot and gently loosen the surface soil.
- Pests: Aphids sometimes appear. Spray lightly with insecticidal soap or a mix of water and natural garlic or neem extract. Ladybugs love borage, so invite them with companion plants.
- Soggy soil or root rot: Check drainage holes. If water pools, repot using a coarser soil mix and ensure drainage.
6. Harvesting
You’ll be harvesting borage flowers approximately 70–90 days after sowing. The star-shaped blooms are ready when their petals are fully open, vibrant sky-blue, and the stems feel firm but tender. Gently pinch or snip flowers early in the morning when they hold their freshest aroma—mildly cucumber-like and slightly sweet.
If you’re harvesting leaves, pick younger, smaller ones as mature leaves have a rougher texture. To enhance flavor, reduce watering a bit in the final week before harvest—this slightly concentrates the plant’s natural sugars.
Store your fresh flowers and leaves in the refrigerator at a stable temperature of 4–7°C (39–45°F), ideally wrapped loosely in a damp cloth or paper towel. They keep well for up to 3–4 days. For longer storage, you can dry the flowers in a dark, well-ventilated space or freeze them on trays and then store in airtight containers.
Extra Tips for Perfect Results
- Companion plants: Plant borage alongside tomatoes, strawberries, basil, and squash. Borage attracts pollinators and repels tomato hornworms.
- Crop rotation: Rotate your borage pots with herbs like thyme or rosemary to avoid soil fatigue and diseases.
- Mulching: Use straw, dried leaves, or grass clippings to keep soil moist and temperature steady.
- Water quality: Use rainwater when possible. Tap water can cause mineral buildup, which hardens soil and limits root health.
- Wind protection: Cluster pots to protect delicate stems from breaking or drying out.
- Shade cloth: In extremely hot sun, provide thin fabric shade during peak midday hours to prevent leaf scorch.
Common Mistakes and How to Fix Them
- Overwatering: Leaves wilt despite soggy soil—let the top 2 cm (¾ inch) dry out before watering again. Repot if roots are soft or blackened.
- Weak growth: Not enough light—move your pot to a sunnier window or outdoors if possible.
- Yellow leaves: Too much nitrogen fertilizer—switch to bloom-promoting feed with higher phosphorus.
- Poor germination: Seeds planted too deep—limit sowing depth to 0.5–1 cm (¼ inch).
- Misshapen roots: Compact soil and poor drainage—amend soil with sand or perlite and ensure holes are open.
Harvest and Storage
Harvest flowers by snipping with scissors rather than pulling to avoid damaging the plant’s growth points. For leaves, pinch gently near the base to avoid tearing stems. Store flowers and leaves in a cool, dark place at 4–7°C (39–45°F) with moderate humidity to keep them fresh up to 2 weeks.
If you want to preserve flowers for winter, dry them by hanging upside down in bunches in a shaded, ventilated spot. Alternatively, freeze flowers in ice cube trays with water for cocktail garnishes or cooking. To save seeds, let selected flower heads mature fully and dry on the plant, then collect and store seeds in airtight containers in a cool, dry place for next season.
What Success Looks Like
When you first hold your handful of deep blue, velvety borage flowers, freshly picked from a pot on your balcony, it’s a moment of simple triumph. The soft petals, cool and lightly fragrant, promise fresh summer salads, floral teas, and cocktails. Expect an average yield of about 30–50 flowers per mature plant and a healthy plant weight of approximately 1–2 kg (2–4 lb) in a 30 cm pot. That’s plenty to enjoy and share, a real reward for your consistent care.
This connection with nature—the daily observation, the subtle changes in color and scent—is what makes gardening in pots so special. You’re not just growing flowers, you’re cultivating experience, patience, and joy.
Mini Recap — Your Success Checklist
- Pot depth: 30 cm (12 in) minimum.
- Soil mix: 70% loam, 20% compost, 10% sand/perlite.
- Watering: Deeply 2–3 times per week, wait for top 2 cm dry.
- Sunlight: 6–8 hours daily, adjust with shade as needed.
- Fertilizer: Every 3–4 weeks, balanced with low nitrogen.
- Harvest: 70–90 days after sowing flowers and leaves.
Closing Reflection
Remember, gardening is less about perfection and more about tending with patience and care. Every time you water, feed, or peek at your potted borage, you learn something new. Don’t rush the process—adapt as you go, watch closely, and embrace the small victories. This is what makes you a gardener. Your borage will grow strong, bloom vibrant, and reward you richly, right there where you plant it.

Hi there — I’m Ava, the creator behind Ava Garden Tips 🌿
I’ve always been passionate about plants, flowers, and the simple joy that comes from growing something beautiful. What started as a small balcony garden has turned into a love for helping others create their own green spaces — no matter how big or small.