
Why Grow Marigolds in Pots? Bright Color Meets Natural Pest Control
If you’re looking for a reliable, cheerful addition to your balcony, windowsill, or small patio, marigolds are a perfect choice. Not only do they burst with vibrant yellows, oranges, and reds that naturally brighten any container garden, but they’re also champion pest fighters. These compact flowers emit scents that repel many common garden pests like aphids, whiteflies, and nematodes. You don’t need acres of space or fancy soil to grow them — just a pot, some soil, and a bit of care. Over the next pages, I’ll walk you through growing marigolds in pots from start to finish, helping you create a colorful, healthy haven that’s both decorative and functional. You’ll feel empowered to nurture these sun-loving blooms, with simple, practical steps tailored for success.
Even if your space is limited, you can turn your pots into buzzing micro-ecosystems that attract beneficial insects while keeping pests away. Ready? Let’s dive in.
Getting Ready — What You’ll Need
Before you dig in, gather all the essentials to set your marigolds up for success.
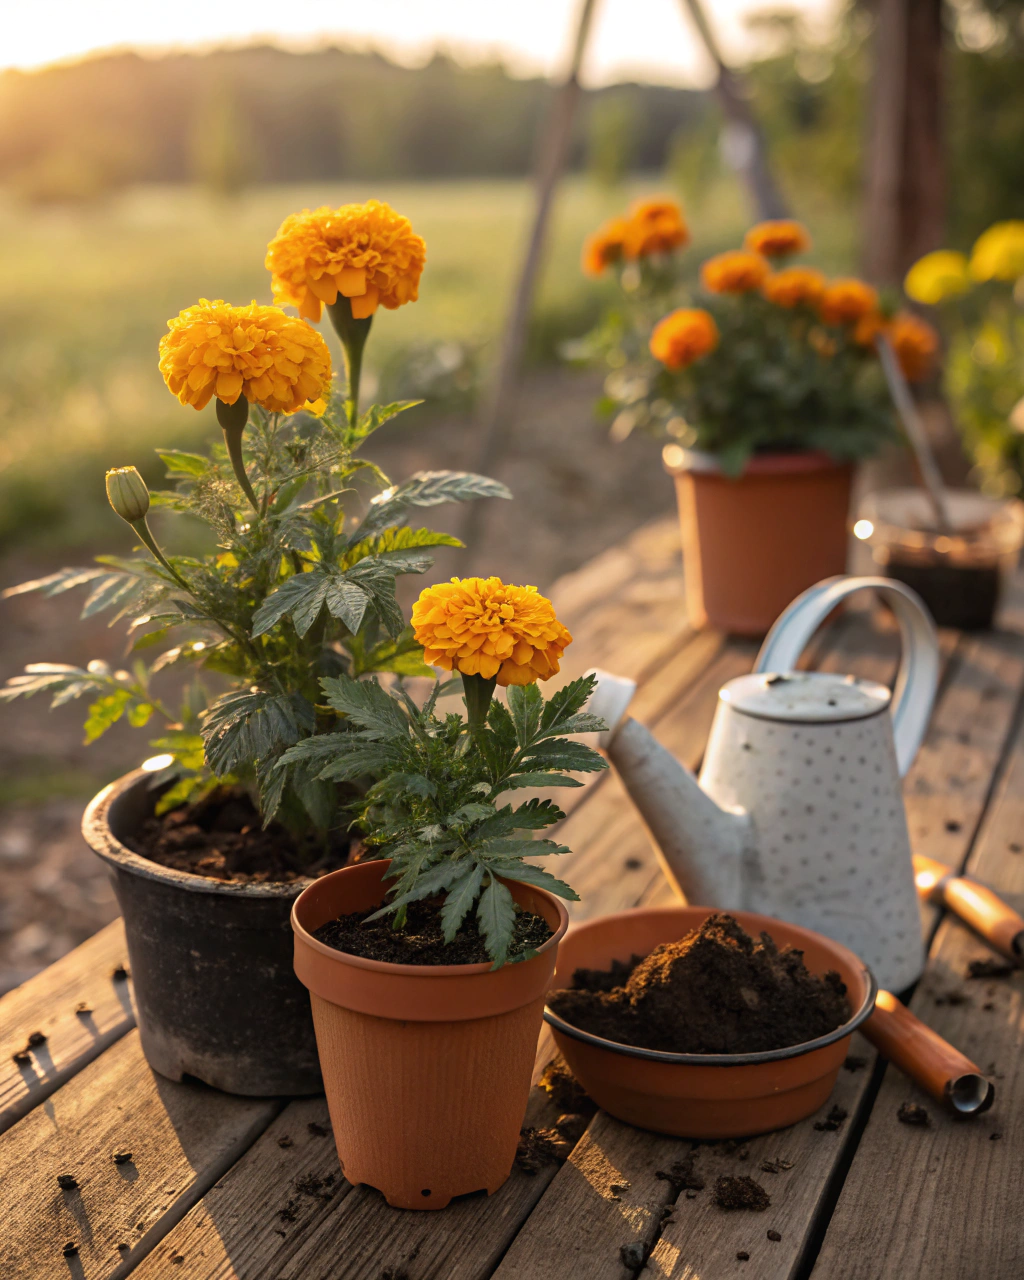
- Container: Choose pots at least 20–30 cm (8–12 in) deep with drainage holes. This depth supports healthy root growth and drainage. Clay pots help keep roots cool in hot climates; plastic is lighter and retains moisture better for drier areas.
- Soil: Use a well-draining potting mix, ideally a blend of 70% loam, 20% compost, and 10% coarse sand or perlite. This mix balances nutrients and aeration so roots breathe.
- Seeds or seedlings: Look for varieties like Tagetes erecta (African marigolds) for larger blooms or Tagetes patula (French marigolds) for compact, bushy plants. Seed packets often note ideal growing zones — pick one suited for your climate.
- Fertilizer: A balanced, slow-release granular fertilizer or liquid fertilizer with lower nitrogen and higher phosphorus supports flowering. (If you prefer organic, use compost tea or fish emulsion.)
- Watering tools: A watering can or hose with a fine nozzle gives gentle, even watering without compacting soil.
- Cleaning tools: Gloves and a small hand trowel keep your hands safe and help with transplanting.
- Sunlight: Marigolds thrive in full sun — aim for 6–8 hours of direct sunlight daily. If you live somewhere cloudy, position pots near southern-facing windows or use reflective surfaces to maximize light.
Optional tip: Add a small layer of mulch like straw or dried leaves after planting to help conserve moisture and reduce weeds.
Step-by-Step — How to Grow Marigolds in Pots
1. Preparing Your Pot
Start with clean containers. Wash your pots with warm, soapy water and rinse thoroughly — old dirt or fungi can harbor disease. Check that drainage holes are clear; if not, use a skewer or drill to widen them to about 0.5 cm (¼ in). This prevents waterlogging, a common cause of root rot.
Place a drainage layer of about 2–3 cm (1 in) using small stones or broken pottery shards at the bottom of each pot. This creates space for excess water to escape freely. Fill the pot with your prepared soil mix to within 2 cm (¾ in) of the rim — allowing room for watering.
Moisture is key now. Your soil should feel like a sponge wrung out — damp but not soggy. Press gently with your finger: it should clump slightly but not puddle water. Avoid compacting soil too tightly. Loose soil with some air space encourages healthy root growth and prevents suffocation.
2. Sowing or Planting
Marigold seeds are tiny, brown, and slightly ridged. Sow them about 0.5–1 cm (¼–½ in) deep in the soil. Space seeds 8–10 cm (3–4 in) apart if sowing in a large pot or 5 cm (2 in) if growing several plants in one container.
Seeds germinate best between 18–24°C (65–75°F). If starting indoors, keep the pot in a warm spot with indirect light until shoots emerge. You’ll see tiny green tips breaking through the soil surface in 5–7 days. Seedlings should be firm but delicate to touch, about the size of a matchstick.
If you prefer, pre-soak seeds in lukewarm water for 12 hours before planting to speed germination. Avoid soaking longer as seeds can rot.
Pro tip: For even germination, cover your seeds with a thin layer of vermiculite or fine soil to retain moisture but prevent smothering.
3. Watering and Sunlight
Water newly sown seeds lightly every day to keep the top soil moist but not soaked. Once seedlings emerge, water deeply about 2–3 times per week in warm weather, aiming until you see moisture dripping from the drainage holes. The soil surface should feel cool and slightly crumbly, not dry or muddy.
In hot, dry, or windy environments, group your pots together to create microclimates that reduce evaporation. Mulching around plants keeps moisture steady. If sun is intense, use a light fabric shade during the hottest midday hours to prevent leaf scorch.
Marigolds love sun — provide 6–8 hours of daily direct light. In cloudy areas, supplement with reflective surfaces (white walls or mirrors) or move pots regularly to follow available light. Less sunlight means fewer blooms and leggier plants.
4. Feeding and Maintenance
Feed your marigolds every 3–4 weeks with liquid fertilizer or slow-release granules low in nitrogen to encourage vibrant blossoms over leafy growth. Check the label for balanced N-P-K ratios such as 5-10-10. Overfeeding with nitrogen leads to lush leaves but fewer flowers.
Thin out crowded seedlings by snipping weaker plants at soil level once they reach a few cm tall, maintaining roughly 15–20 cm (6–8 in) spacing per plant for airflow.
Prune faded flowers regularly (“deadheading”) to encourage nonstop blooming. Run your fingers through the soil; if it feels firm and clumpy, you might need to gently aerate with a fork to prevent compaction.
Watch for wilting leaves or splitting stems: these signal stress. Adjust watering and fertilizing accordingly.
As I’ve learned over years, “The secret is not more work — it’s regular care and observation.” When you spend a few moments each day inspecting your plants, problems don’t pile up.
5. Troubleshooting While They Grow
Problems can sneak up, but quick action avoids bigger issues.
- Yellow leaves: This often means excess nitrogen or waterlogged soil. Reduce fertilizer and let the top 2 cm of soil dry before watering again.
- Stunted growth: Marigolds need sunlight and airflow. Move pots to brighter spots and thin crowded plants.
- Pests: Aphids, spider mites, and whiteflies love marigolds less than you do. Wash leaves gently with water or use insecticidal soap. Introducing ladybugs can keep pests balanced naturally.
- Soil staying soggy: Check for blocked drainage holes or overly compacted soil. Repot with fresh mix and ensure drainage.
- Fading flowers: Deadhead spent blooms to refresh energy into new buds.
6. Harvesting
Though often grown for color and pest control, you can harvest marigold petals for culinary and medicinal uses. Petals typically mature 70–90 days after sowing, when flowers are fully open and vibrant.
Cut blooms early in the morning when oils and color are most intense. Use sharp scissors or pruners to snip stems cleanly, leaving some leaves intact to support regrowth.
The petals should feel velvety and look saturated with bright hues — firm but delicate to the touch. Harvest regularly to prolong flowering.
For storage, dry petals in a cool, dark area on screens or parchment paper, then store in airtight containers below 20°C (68°F) for up to 6 months. You can also freeze fresh petals in ice cube trays with water for later use.
To save seeds, let flower heads dry completely on the plant, then collect and store seeds in paper envelopes in a cool, dry place until next season.
Extra Tips for Perfect Results
- Plant marigolds alongside tomatoes, basil, or peppers. They repel nematodes and improve overall garden health.
- Rotate your pots each season to prevent soil fatigue and disease buildup.
- Mulch with straw or shredded leaves to retain soil moisture and regulate temperature.
- Use rainwater when possible. It’s softer than tap water and helps keep soil structure loose.
- Group pots in windy areas to reduce moisture loss and increase stability.
- Under strong sun, consider thin shade cloth around midday to protect fragile seedlings.
Common Mistakes and How to Fix Them
- Overwatering: Roots turn soggy and yellow leaves appear. Let the top 2 cm dry completely before watering again.
- Inadequate light: Weak, leggy plants signal insufficient sun. Shift to a brighter spot.
- Incorrect fertilization: Too much nitrogen causes excessive foliage but few blooms. Use a fertilizer higher in phosphorus.
- Planting seeds too deep: Germination drops if planted beyond 1 cm depth. Stick to 0.5–1 cm depth for best results.
- Compacted soil: Crusty potting mix restricts roots. Mix in coarse sand or perlite before planting.
Harvest and Storage
When harvesting, handle flowers gently to avoid bruising petals or breaking stems. Use clean, sharp tools and harvest during dry weather for longer shelf life.
Store freshly cut flowers in water at room temperature for up to 3 days. Dried petals should be kept in dark, airtight containers at 15–20°C (59–68°F) with low humidity for up to 6 months.
For seeds, wait until flower heads dry completely, then collect seeds by gently rubbing pods. Let seeds cure in a dry place before storing in paper envelopes at temperatures between 4–7°C (39–45°F) for preservation.
Alternative preservation includes freezing petals or making marigold-infused oils and balms, useful for home remedies.
What Success Looks Like
Picture bright orange clusters swaying gently in a sun-dappled breeze. When you touch those smooth petals, there’s a warm, dry aroma hinting at summer’s end. You’ll see healthy green foliage, nearly 20–30 cm (8–12 in) tall, packed with blooms in full sun.
A single 30 cm (12 in) pot can yield about 1–2 kg (2–4 lb) of fresh flowers over a season. Success is knowing you’ve created a lively, pest-repelling oasis in limited space.
Growing these flowers teaches patience and attention — that adjusting water, light, and feed regularly scales up your blooms and keeps pests at bay. Remember, every healthy plant is a small victory.
Mini Recap — Your Success Checklist
- Pot depth: minimum 30 cm (12 in).
- Soil mix: 70% loam, 20% compost, 10% sand/perlite.
- Watering: 2–3 times per week with moisture check.
- Sunlight: 6–8 hours of direct sun daily.
- Fertilizer: every 3–4 weeks, focus on phosphorus.
- Seed depth: 0.5–1 cm.
- Spacing: 8–10 cm for seedlings.
- Harvest time: 70–90 days after sowing.
Closing Reflection
Growing marigolds in pots is not about perfection; it’s about small, consistent actions. Your daily garden moments — watering just right, watching seedlings unfold, and spotting the first flower — build a meaningful connection with nature.
Each bloom you nurture is a lesson in patience and sensitivity. You become an observer and a creator, crafting vibrant color and natural defense into your space. You can grow marigolds anywhere, no matter the size of your garden, because success comes from attention and care, not space.
Remember, “Every plant you grow teaches you something new. Don’t rush it — watch, adjust, and enjoy. That’s what makes you a gardener.” Soon, your pots won’t just hold soil; they’ll hold your pride and joy.

Hi there — I’m Ava, the creator behind Ava Garden Tips 🌿
I’ve always been passionate about plants, flowers, and the simple joy that comes from growing something beautiful. What started as a small balcony garden has turned into a love for helping others create their own green spaces — no matter how big or small.