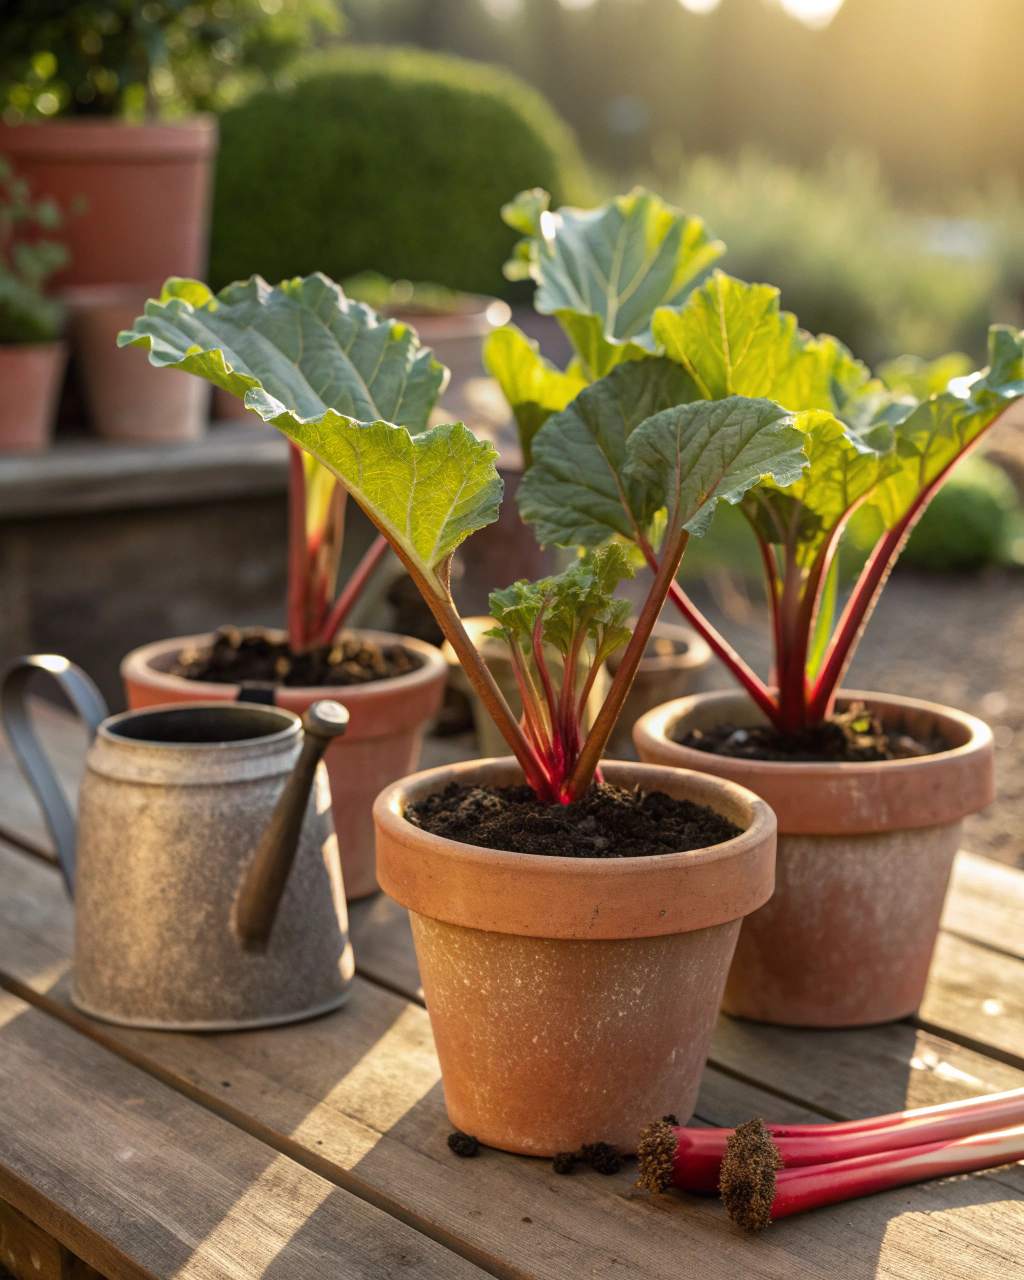
Why Grow Rhubarb in Pots for Sweet Desserts All Season?
Rhubarb is one of those plants that turns simple desserts into something truly special — its tartness balances sweetness perfectly in pies, crumbles, and jams. And here’s the great news: you don’t need a big garden to enjoy fresh rhubarb. Whether you have a balcony, patio, or just a sunny corner, growing rhubarb in pots is not only possible but incredibly rewarding. You’ll savor crisp, juicy stalks from spring through late summer, picking just what you need without waste. Plus, growing in pots lets you control soil quality, water, and sun exposure easily. In this guide, I’ll walk you step-by-step through the process with clear, practical advice. Trust me—you can do this, and by the end of the season, you’ll be whipping up desserts that friends beg for.
Getting Ready — What You’ll Need
Before you start, gather the essentials. Choosing the right items now means fewer headaches later and healthier plants.
- Container: A pot at least 30 cm (12 in) deep and 40 cm (16 in) wide works best. Rhubarb roots need space to spread. If your balcony is hot, try clay pots—they keep roots cooler than plastic.
- Soil: Use rich, well-draining soil with a slightly acidic to neutral pH between 6.0 and 7.0. A mix of 70% loam, 20% compost, and 10% coarse sand creates the ideal texture and fertility.
- Fertilizer: A balanced, low-nitrogen fertilizer is key—look for formulas with a higher phosphorus ratio like 5-10-5. Organic options like compost tea or seaweed extract work great too.
- Variety: Choose pot-friendly types such as ‘Victoria’ or the early variety ‘Glaskin’s Perpetual’ that don’t require massive spaces.
- Watering tools: A watering can with a fine rose or a drip system keeps soil evenly moist without washing away nutrients.
- Sunlight: Rhubarb needs at least 6–8 hours of direct sun for optimal stalk development. If your spot is partially shaded, it will still grow but expect slower growth.
- Additional tools: Gloves for handling stalks, a trowel for planting, and mulch material like straw or dried leaves to lock in moisture.
If you’re on a budget, upcycle a large bucket or wooden crate with drainage holes. For soil, mixing garden soil with leftover compost bags can substitute premium potting mix.
Step-by-Step — How to Grow Rhubarb in Pots
1. Preparing Your Pot
Start by thoroughly cleaning your container to remove old soil or pests. Use a mild bleach solution or hot water, then rinse well. A clean pot prevents disease and fungus.
Add a 3–5 cm (1.2–2 in) drainage layer at the bottom with small stones or broken terracotta pieces. This keeps roots from sitting in water and rotting.
Next, fill your pot with the prepared soil mix—remember the ratio: 70% loam, 20% compost, 10% coarse sand. The sand improves drainage while compost feeds your plant.
Firm the soil gently with your hands—like patting a soft cake—so it’s evenly settled but not compacted. Overly compacted soil prevents air and water from reaching roots.
Keep soil moisture like a wrung-out sponge: damp but not soggy. A good test is to squeeze a handful; water should barely drip.
Common mistake: Don’t forget drainage holes—no holes mean soggy roots. Also, avoid overly acidic or alkaline soil; pH should stay between 6.0 and 7.0.
2. Sowing or Planting
Rhubarb is most commonly grown from crowns (root divisions), but starting from seed is possible. If planting crowns, place them just below the soil surface, covering the roots with about 5 cm (2 in) of soil. Space crowns at least 30 cm (12 in) apart—even in pots, this helps prevent overcrowding.
If sowing seeds, plant them at a shallow depth of 0.5–1 cm (0.2–0.4 in). Pre-soaking overnight softens the hard seed coat, speeding germination. Maintain soil temperature at around 18–21°C (65–70°F) for best results. Seeds usually sprout in 10–14 days.
You’ll know it’s right when the soil feels warm and “springy” under your fingers and seeds settle easily without washing away.
Pro tip: When sowing seeds, sprinkle a thin layer of vermiculite or fine sand on top. This retains moisture but prevents crusting, making seedlings easier to emerge.
3. Watering and Sunlight
Water rhubarb deeply until you see moisture at the bottom of the pot. In warm weather, this usually means watering about 2–3 times per week. In cooler or rainy weather, adjust to less frequent watering.
Feel the soil surface—if the top 2 cm (0.8 in) is dry, it’s time to water again. Avoid letting soil dry out completely. Conversely, if leaves droop and soil feels soggy, cut back watering immediately and check drainage.
Rhubarb thrives in 6–8 hours of direct sunlight daily. In cloudier or northern climates, pick the sunniest spot you have. If the plant looks leggy and pale, it probably needs more light.
In hot or windy locations, create microclimates by grouping pots together, adding mulch to reduce evaporation, or providing afternoon shade with a light fabric veil. Clay pots can also help keep roots cool under intense heat.
4. Feeding and Maintenance
Start feeding your rhubarb after shoots are 15 cm (6 in) tall—to avoid burning tender roots. Use a balanced fertilizer with increased phosphorus, applying it every 3–4 weeks. Liquid fertilizers diluted to half strength work excellently.
Thin out weak or crowded shoots early to improve airflow and prevent fungal issues. This also directs energy to stronger, more productive stalks.
Dig lightly around the soil surface monthly to aerate, encouraging better root oxygenation — without disturbing the roots deeply.
Watch for nutrient imbalance signs: dull, yellow leaves often mean too much nitrogen, while pale stalks suggest phosphorus deficiency. Overwatering can cause soft, wilting leaves that quickly brown.
“The secret is not more work — it’s regular care and observation.” That’s my gardening mantra. A simple weekly check keeps your rhubarb healthy and productive.
5. Troubleshooting While They Grow
Problems pop up—but fixing them fast keeps your harvest on track.
- Yellow leaves: Often excess nitrogen or waterlogging. Cut back fertilizer and water less.
- Stunted growth: Too little sun or root crowding. Move pots to brighter spots and thin shoots.
- Leaf curl or holes: Pests like aphids or slugs. Spray with soft soap solution or handpick slugs early morning.
- Root rot: Soil staying soggy due to poor drainage. Check holes and add more sand to soil mix.
- Poor seed germination: Seeds planted too deep or soil too cold. Resow shallower and keep away from drafts.
6. Harvesting
Your rhubarb stalks are ready when they’re thick, firm, and bright red or pink with a smooth, matte finish—usually 70–90 days after planting.
To harvest, grasp the stalk near the base and pull gently with a small twisting motion until it snaps free. You should feel a crisp “pop,” a satisfying sign of freshness.
A key tip is to reduce watering the week before harvest to concentrate flavor and improve stalk tenderness.
Store freshly cut rhubarb in a dark, cool place around 4–7°C (39–45°F) with high humidity, ideally wrapped in a damp cloth or in a perforated plastic bag to keep it crisp for up to 2 weeks.
Extra Tips for Perfect Results
- Companion plants: Grow chives (repels aphids), mint (deters slugs), nasturtiums (trap pests), or parsley (attracts beneficial insects) nearby to boost rhubarb health.
- Rotate pots each season to avoid soil nutrient depletion and disease buildup.
- Mulch your rhubarb surface with straw or dried leaves to retain moisture and regulate soil temperature.
- Collect rainwater for irrigation—tap water with high mineral content can harden soil and stress plants.
- In exposed, windy areas, cluster pots together to share humidity and add stability.
- During peak summer heat, provide a light shade cloth during midday to protect leaves and roots from scorching.
Common Mistakes and How to Fix Them
- Overwatering: Soft, rotten roots. Let the top 2 cm (0.8 in) dry before watering again.
- Weak growth: Insufficient light. Move pots to sunnier spots.
- Yellow leaves: Excess nitrogen fertilizer. Switch to one higher in phosphorus or use organic compost.
- Poor germination: Seeds planted too deep—limit depth to 0.5–1 cm (0.2–0.4 in).
- Misshapen roots: Soil too compacted. Mix in coarse sand or perlite for better airflow.
Harvest and Storage
When harvesting, always pull stalks gently — this avoids damaging the crown and allows continuous growth throughout the season. Never cut stalks with scissors or knives as this can create entry points for pests and disease.
After harvesting, keep rhubarb cool and moist. Store stalks at a steady 4–7°C (39–45°F) and near 90% humidity for up to 2 weeks. To extend shelf life, you can also preserve rhubarb by freezing chopped pieces or making jams and pickles.
Saving seeds for next season is easy: let a few stalks flower and go to seed in late summer, then collect and dry seeds thoroughly before storage. Keep them in a cool, dry place for sowing next spring.
What Success Looks Like
When you pull your first firm, fragrant rhubarb stalk from the pot, you’ll feel a quiet satisfaction—proof that consistent attention and gentle care pay off. Expect an average yield of 1–2 kg (2–4 lb) per container each season, enough to make several delicious desserts or a batch of homemade jam.
Picture the vibrant crimson stalks shining in morning light, the crisp snap as you break one, and the zingy aroma that hints at spring in every bite. That’s the essence of gardening—an ongoing conversation between you and nature.
Your success isn’t just in the harvest. It’s in observing daily changes, learning from each challenge, and connecting to the soil and sun. That connection is the true reward of growing rhubarb in pots.
Mini Recap — Your Success Checklist
- Pot depth: Minimum 30 cm (12 in).
- Soil mix: 70% loam, 20% compost, 10% coarse sand.
- Watering: About 2–3 times per week, adjust by soil moisture touch test.
- Sunlight: 6–8 hours of direct sunlight daily.
- Fertilizer: Every 3–4 weeks, low nitrogen, higher phosphorus.
- Harvest: Between 70–90 days after sowing or planting crowns.
Closing Reflection
Remember, growing rhubarb is not about perfection but persistence. Each small step—watering, feeding, checking leaves—builds toward your harvest. Every plant you nurture teaches you something new. Don’t rush it. Watch, adjust, and enjoy the quiet progress unfolding in your pot. That’s what makes you a gardener.

Hi there — I’m Ava, the creator behind Ava Garden Tips 🌿
I’ve always been passionate about plants, flowers, and the simple joy that comes from growing something beautiful. What started as a small balcony garden has turned into a love for helping others create their own green spaces — no matter how big or small.
