
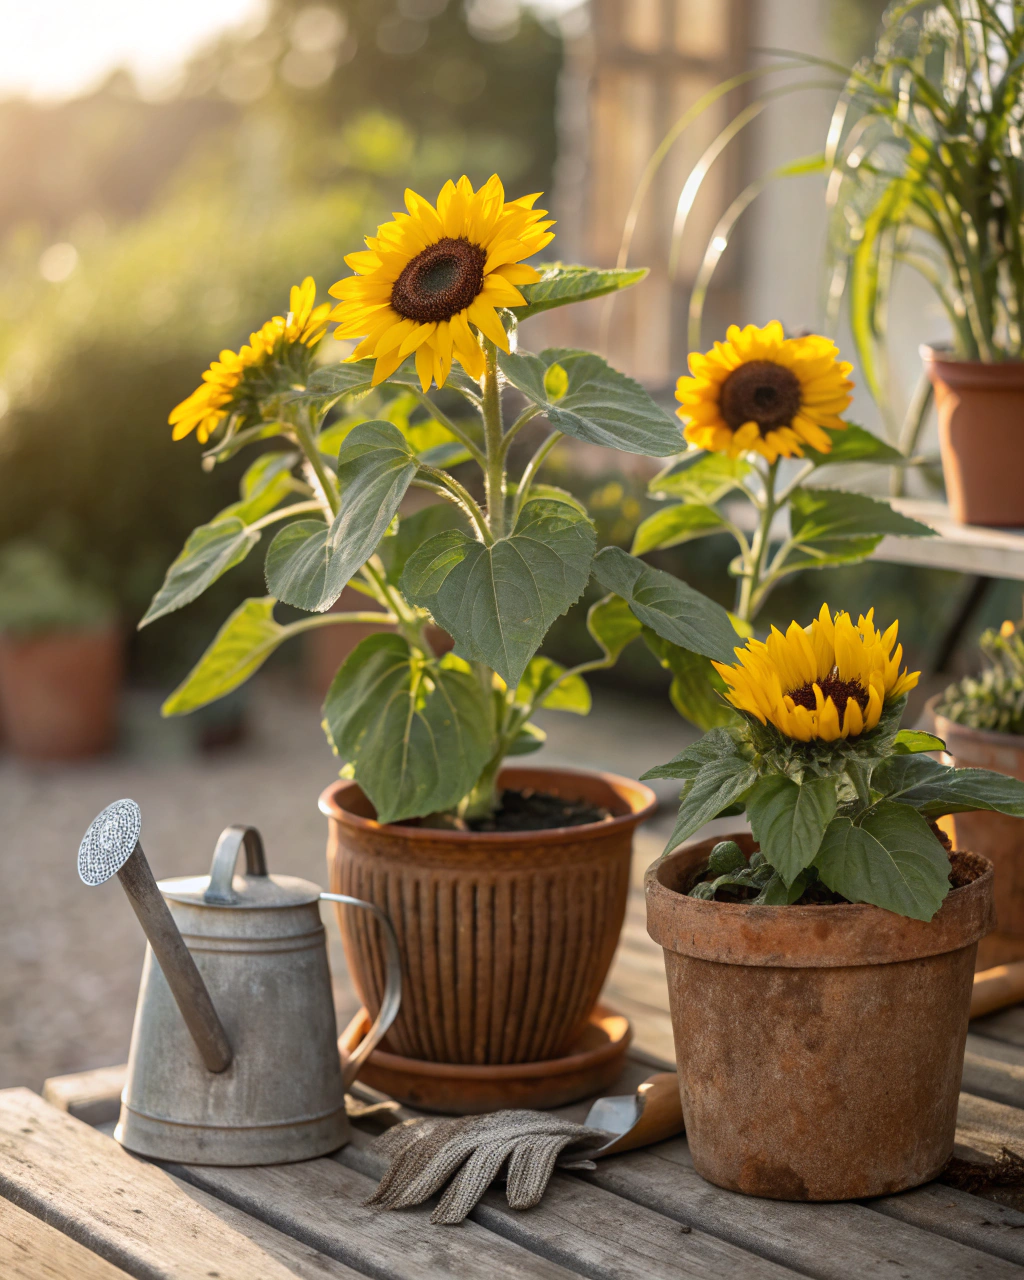
Why Grow Sunflowers in Pots?
Sunflowers are more than just cheerful faces in the garden — they bring vibrant yellow blooms that brighten any space. If you think you need a large yard to grow them, think again. With the right approach, you can grow spectacular sunflowers in pots, even on a small balcony or patio. You’ll enjoy watching them grow tall, feel the rough, hairy stems beneath your fingers, and see the confident nodding heads turn toward the sun. Plus, sunflowers attract beneficial pollinators, and their seeds are a rewarding snack or bird feeder. In this guide, I’ll walk you through each step clearly and simply, so you feel equipped and inspired to grow your own sunny bouquet, no matter your space or experience.
Getting Ready — What You’ll Need
Before you start, gather these essentials to give your sunflowers the best start:
- Containers: At least 30 cm (12 inches) deep and 30–40 cm wide pots. Choose plastic for lightweight ease or terracotta for natural breathability (if your area is very hot, clay pots help keep roots cool).
- Seed selection: Opt for dwarf or bush varieties, such as ‘Sunbright’ or ‘Elf’, which stay compact (30–60 cm tall), perfect for pots. Giant sunflowers can get too big and unstable.
- Soil: Use a rich, well-draining potting mix — ideally 70% loamy soil, 20% compost, and 10% coarse sand or perlite for aeration and moisture control.
- Drainage materials: Small stones or broken pottery shards for a 2–3 cm drainage layer at the pot’s base to prevent waterlogging.
- Fertilizer: Balanced, low-nitrogen liquid fertilizer or slow-release pellets (e.g., NPK 5-10-10) for encouraging blooms over foliage.
- Light: Access to 6–8 hours of direct sunlight daily — sunflowers are sun lovers.
- Watering can or hose: With a gentle rose spray to avoid disturbing seedlings.
- Tools: A trowel for soil preparation, gloves for handling rough stems, and a small garden fork to aerate soil if needed.
Tip: For a budget option, recycle old buckets or large plastic containers with holes drilled for drainage. Compost from kitchen scraps can substitute for commercial compost.
Step-by-Step — How to Grow in Pots
1. Preparing Your Pot
Start by thoroughly cleaning your container to avoid disease. Rinse and scrub the pot with soapy water, then let it dry completely. Next, place a 2–3 cm layer of drainage material at the bottom of the pot. This prevents excess water from drowning the roots.
Fill your pot with your soil mix — remember, a balanced, light, and well-aerated soil is key. Fill to about 2–3 cm below the rim to allow room for watering. Be careful not to compact the soil; it should feel like a slightly damp sponge, wrung out but spongy enough to hold moisture without pooling water on the surface.
A common mistake is using heavy, compacted soil or pots without drainage holes. Both lead to root rot and stunted growth. Also, avoid overly acidic or alkaline soils — sunflowers prefer a neutral pH around 6.0 to 7.5.
2. Sowing or Planting
Sunflower seeds are large and hearty, but they germinate best when planted at the right depth and spacing. Sow seeds about 1.5 cm (0.5–1 inch) deep in the soil. For pots, plant 2–3 seeds per pot to allow for thinning later. Space seeds about 8–10 cm apart to give young plants room to grow strong without overcrowding.
Pre-soaking seeds in warm water for 6–8 hours can speed up germination and soften the tough seed coat (called scarification). When you plant, the soil should be warm — ideally between 18–24°C (65–75°F). You’ll know the conditions are right when the soil feels pleasantly warm to the touch, not cold or chilly.
Pro tip: Mark the seed spots lightly with a small stick or clod of soil to avoid disturbing emerging shoots during watering.
3. Watering and Sunlight
From sowing onward, water gently but deeply. Aim to water until you see moisture draining from the pot’s holes, usually about once every 2–3 days for seedlings, increasing to 2–3 times per week during warmer weather. The key is consistency — keep the soil moist but never soggy, feeling like a damp sponge rather than a mud pie.
If you’re in a hot, dry, or windy zone, cluster pots together to create a microclimate that retains humidity, and add mulch to reduce evaporation. Partial shade during the hottest midday hours can prevent stress, but sunflowers generally prefer full sun — 6 to 8 hours daily for the best blooms.
On cloudy days, don’t overwater. Plants need less water when sunlight is reduced. Pay attention to the leaves’ curl and the soil surface for dryness.
4. Feeding and Maintenance
Feed your sunflowers every 3–4 weeks with a liquid fertilizer low in nitrogen but richer in phosphorus and potassium, supporting strong stems and large flower heads. Follow package instructions carefully to avoid overfeeding, which can cause overly lush leaves but poor blooms.
Once seedlings develop their second pair of true leaves, thin them by snipping weaker plants with scissors, leaving one healthy plant per pot. This ensures each sunflower has enough nutrients and space.
Check soil aeration regularly. If the soil feels compacted or waterlogged, gently loosen the surface with a fork, taking care not to disturb roots.
Keep an eye out for pests and diseases, removing damaged leaves promptly.
“The secret is not more work — it’s regular care and observation.” That’s a gardener’s truth. A little daily attention goes a long way.
5. Troubleshooting While They Grow
Here are some common issues you might encounter and how to solve them quickly:
- Yellow leaves: Often a sign of excess nitrogen or poor drainage. Cut back on fertilizer or improve drainage by checking holes and soil mix.
- Stunted growth: Too little sunlight—move pots to a brighter spot.
- Pests like aphids or caterpillars: Spray gently with a mild soap solution or rinse with water to dislodge pests.
- Leaves wilting despite watering: Possibly root rot—check drainage holes and reduce watering frequency.
- Poor germination: Seeds planted too deep—next time, sow at 0.5–1 cm deep.
6. Harvesting
While sunflowers aren’t typically “harvested” like vegetables, you’ll want to know when your blooms have reached peak stage. Flowers are ready when petals are fully open, bright yellow, and the back of the flower head turns from green to a soft yellow or brown. This usually takes between 70–90 days from sowing, depending on variety.
To collect seeds, wait until the flower head droops, and the seeds look plump and firm, with black-and-white striped shells. If you want to eat or store seeds, cut the head with a 10 cm (4 inch) section of stem attached. Reduce watering in the final week to intensify seed flavor.
Dry the heads in a warm, airy space. You’ll feel the seed heads lighten as they dry and hear a subtle rattling when shaken.
Small storage tip: Store harvested seeds in a cool (4–7°C / 39–45°F), dry, dark spot for up to 2 weeks. For longer storage, dry fully and freeze or dry completely for bird feeders.
Extra Tips for Perfect Results
- Companion plants: Try marigolds (deter pests), nasturtiums (attract aphids away), basil (improves flavor and growth), or beans (fix nitrogen).
- Rotate pots slightly each week to prevent soil fatigue and sunburned stems.
- Mulch with straw or dry leaves to retain moisture and suppress weeds.
- Use rainwater where possible — tap water’s chlorine and minerals can harden soil over time.
- Cluster pots in windy areas for better stability and shared moisture retention.
- In extreme heat, drape a light fabric shade during peak sun hours to protect delicate seedlings.
Common Mistakes and How to Fix Them
- Overwatering: Roots stay soggy and rot—always let the top 2 cm of soil dry out before watering again.
- Weak growth: Insufficient sun—move to a brighter, sunnier location.
- Yellow leaves: Too much nitrogen in fertilizer—switch to one higher in phosphorus.
- Poor germination: Seeds sown too deep—keep depth between 0.5–1 cm.
- Misshapen roots: Soil too compacted—always mix in coarse sand or perlite for airflow and drainage.
Harvest and Storage
When your sunflower heads are ready for harvesting seeds, handle them gently to avoid damaging the fertile seeds. Cut the head leaving a 10 cm stalk section for ease of handling. Hang the heads upside down in a well-ventilated, dry place away from direct sunlight.
Maintain storage temperatures between 4 and 7°C (39–45°F) and low humidity to prevent mold for up to 2 weeks. Dried seeds can be shelled and stored in airtight containers for months.
For longer preservation, consider drying seeds completely and freezing them, or try pickling or roasting for a tasty treat.
Don’t forget to save some of the best seeds for next season — select fully mature, plump seeds. Dry them thoroughly, store in labeled envelopes, and keep in a cool, dry area.
What Success Looks Like
Imagine pulling a sturdy sunflower from its pot, the rough hairs brushing your hands, the strong stem gently bending but not breaking. The petals glow golden in the sunlight, and you hear a faint rustling as mature seeds shift within the flower head. That moment is pure satisfaction — proof that your care and patience created something vibrant and alive. A single pot often yields 1 to 2 kg (2 to 4 lb) of seeds or beautiful flowers to brighten your home.
Success here isn’t about perfection but about connection — noting the warmth from the sun on the leaves, the gentle sway of stalks, and the busy buzz of bees. Consistency, observation, and a bit of nurturing will reward you with sunbound happiness in pots.
Mini Recap — Your Success Checklist
- Pot depth: At least 30 cm (12 in).
- Soil mix: 70% loam, 20% compost, 10% sand.
- Watering: About 2–3 times per week, adjust by feel.
- Sunlight: 6–8 hours daily.
- Fertilizer: Every 3–4 weeks, low nitrogen formula.
- Harvest: 70–90 days from sowing.
Closing Reflection
Remember, every sunflower you grow teaches you patience and attentiveness. There’s no rush — each leaf and flower unfolds in its own time. Watch, adjust, and enjoy the process. This connection with nature is the heart of gardening. You’re not just planting seeds in soil; you’re cultivating confidence and joy. And that makes you a gardener.

Hi there — I’m Ava, the creator behind Ava Garden Tips 🌿
I’ve always been passionate about plants, flowers, and the simple joy that comes from growing something beautiful. What started as a small balcony garden has turned into a love for helping others create their own green spaces — no matter how big or small.