
Introduction
Orchids hold a special place in our homes with their stunning flowers and graceful presence. You don’t need a greenhouse or years of experience to coax your orchid into blooming again. With the right care, attention, and a little patience, your potted orchid can thrive on your windowsill or balcony, rewarding you with vibrant, natural reblooms. This guide will walk you through every step, helping you understand your plant and create the perfect conditions for healthy growth and beautiful flowers year after year.
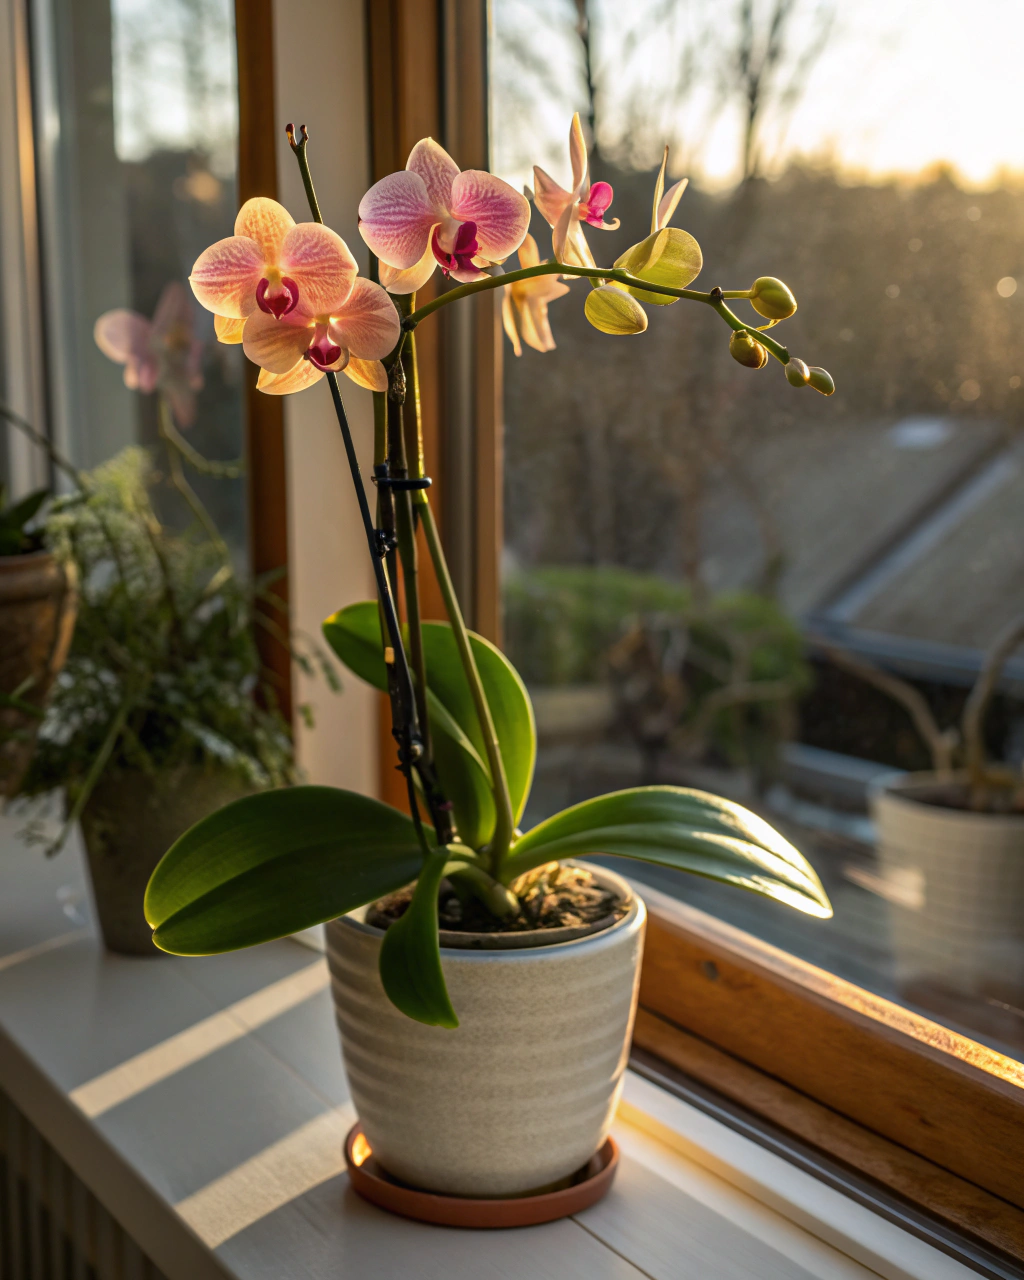
Preparing the Perfect Setup
Before diving into care routines, it’s essential to establish the right home for your orchid. The right container, substrate, and environment set the stage for your plant’s overall health and blooming potential.
Start with the pot: choose a container that is about 12–15 cm in diameter for most common orchids like Phalaenopsis. The pot must have ample drainage holes to prevent water accumulation. Standing water near roots is a quick route to root rot, so avoid pots that retain moisture. If your living space tends to be warm, opt for clay pots—they breathe more, keeping roots cooler and preventing sogginess.
Your orchid needs an airy but moisture-retentive substrate that mimics its natural epiphytic environment. A classic mix includes roughly two parts chunky fir bark, one part sphagnum moss, and one part perlite. This combination provides drainage while holding enough moisture and air. The substrate’s pH should fall between 5.5 and 6.5, favoring slightly acidic conditions which orchids prefer.
Light is crucial. Orchids flourish in 6–8 hours of bright indirect light daily—equivalent to about 10,000–20,000 lux. A sheer curtain is your best friend, softening harsh sunlight to prevent leaf burn while still nurturing photosynthesis.
Humidity is often overlooked but vital. Maintain relative humidity between 50 and 70% using water trays filled with pebbles, grouping plants for natural moisture buildup, or a humidifier if indoor air gets too dry. Aim for a consistent environment to keep your orchid comfortable.
Temperature swings outdoors can stress plants, so indoors aim for daytime ranges between 18 and 24°C (65–75°F), with night temperatures staying above 13°C (55°F). This balance encourages growth without shock.
Finally, feeding your orchid stimulates growth and reblooming. Use a balanced liquid fertilizer such as a 20-20-20 N-P-K formula diluted at a 1:10 ratio, applying every 3–4 weeks. This supplies nitrogen, phosphorus, and potassium evenly, essential for foliage health and flower production. Look for organic or eco-friendly options if you prefer, like fish emulsion-based fertilizers, which offer slow nutrient release.
- Pot: correct diameter (~12–15 cm) and drainage holes; clay preferred in warm spaces.
- Substrate: fir bark, perlite, and moss mix; pH 5.5–6.5.
- Light: 6–8 hours bright indirect light (~10,000–20,000 lux); use sheer curtains to diffuse sun.
- Humidity: maintain 50–70% RH with trays, grouping, or humidifier.
- Temperature: day 18–24°C (65–75°F), night above 13°C (55°F).
- Fertilizer: liquid 20-20-20 diluted 1:10 every 3–4 weeks.
Step-by-Step Care Routine
1) Understanding the Plant’s Cycle
Orchids don’t bloom continuously; they go through distinct growth and rest phases that shape your care routine. After a flowering cycle concludes, your orchid enters a recovery phase — focusing energy on strengthening roots and building leafy growth rather than flowers. This period is delicate; forcing blooms prematurely can exhaust the plant and stunt future flowering.
Many orchid lovers, myself included, have stumbled here. I once watered my moth orchid daily right after blooming, believing more water meant faster recovery. Instead, soggy roots invited rot and slowed growth. That experience taught me that patience during rest, combined with measured watering and attention, prepares an orchid to bloom magnificently again.
During the recovery phase, attend meticulously to roots and leaves. Keep them vibrant, firm, and healthy. Then, as new spikes begin to form, it signals the time to adjust care toward bloom encouragement.
2) The Right Pot and Substrate
Checking if your orchid needs repotting is easier than you think. Gently lift the plant from its pot. Feel the substrate — it should be light, airy, and coarse. If the bark mix feels compressed, soggy, or has started to decompose, it’s time for fresh media. Also, inspect roots: are they firm and plump, or shriveled and gray? Overflowing roots circling tightly around the pot’s edge also signal a need for repotting.
If roots look healthy and substrate smells fresh and earthy, keep the same pot to avoid unnecessary stress to the plant. Many well-cared-for orchids thrive for over two years in the same medium without trouble.
A common mistake is to use dense, moisture-retaining potting soil—like the kind for tropical houseplants—which suffocates orchid roots, depriving them of oxygen. Orchids need the opposite: an open, breathable mix that mimics their natural habitat of clinging to tree bark.
3) Watering the Smart Way
Watering balances orchid health like a tightrope walk. Water too much, and roots drown — too little, and they shrivel up. The key is to water thoroughly only when the top 2–3 cm of your medium feels dry to the touch. This means your fingers will feel the surface as slightly dry but not cracked or powdery.
Use lukewarm water, ideally between 20–24°C (68–75°F). Hard tap water may leave mineral buildup; if possible, use filtered, rain, or distilled water. When watering, saturate the substrate until water flows freely from drainage holes. Always let excess drain completely—never let water pool underneath.
Adjust watering frequency by season. In warm, dry months, weekly watering might suffice. But during cooler winter months, reduce watering to every 10–14 days. Try the “weight test”: lift your orchid’s pot before and after watering. You’ll notice it feels significantly lighter when ready for water, offering a reliable guide over calendar dates alone.
4) Light, Temperature, and Humidity Balance
Creating the right environmental balance turns your home into a nurturing orchid oasis. Place your orchid near an east-facing window where it receives bright but indirect morning light for around 6–8 hours. East light avoids overheating while supplying the gentle brightness orchid leaves crave.
Rotate your pot weekly to encourage even growth and prevent leaves from leaning toward the light source. Uneven growth often results in lopsided flower spikes or leaf clusters.
Temperature variation should be mild but consistent with day temperatures between 18 and 24°C and nights above 13°C. A common stress signal is yellowing leaf tips or leaves that wrinkle and feel papery — symptoms of either heat stress, insufficient humidity, or light imbalance.
For humidity, maintain levels near 60%. Raised humidity reduces water loss from leaves and roots. Simple methods include pebble trays filled with water beneath the pot, grouping several houseplants together to create a microclimate, or running a humidifier nearby. Avoid letting leaves stay wet after misting, as that encourages fungal issues.
5) Feeding and Fertilization
Feeding your orchid correctly can make the difference between a robust flower spike and a sparse or missing bloom. Use a balanced liquid fertilizer like 20-20-20 applied at a dilution of 1:10 (one part fertilizer to ten parts water) every 3–4 weeks during the active growing season.
Stop feeding during winter dormancy to prevent nutrient overload when growth naturally slows. If you notice pale, yellowing leaves, your orchid is probably hungry. Conversely, a white crust on the substrate surface or pot edges signals excess fertilizer salt—flush the pot monthly with plain water to wash away buildup.
Organic alternatives such as seaweed extract or fish emulsions offer gentle nutrient boosts with less risk of salt accumulation. No matter the feed, always check your orchid’s response and adjust frequency accordingly.
6) Pruning, Cleaning, and Post-Bloom Maintenance
After your orchid finishes blooming, carefully assess its flower spike. If the spike remains green and healthy, cut it about 1 cm above a node — a small “bump” along the stem where new blooms may arise. If it’s brown or dried, prune the spike back to the base. Use clean, sterilized shears, wiping blades with rubbing alcohol before and after to prevent infection.
Keeping leaves dust-free improves photosynthesis and helps the plant breathe. Gently wipe leaves every two weeks with a soft, damp cloth. Avoid chemical leaf shines, which may clog pores on the leaf surface.
I often remind fellow growers that “the secret isn’t doing more — it’s observing better.” This means pausing regularly to notice subtle changes: new root growth, leaf texture, or budding spikes signals your plant’s next steps.
7) Repotting — Only If Needed
Repotting an orchid is stressful for the plant, so avoid doing it “just in case.” Only repot when bark has decomposed into mush, drainage slows, or the roots begin tightly circling the pot. Typically, this occurs every 12–24 months.
When your orchid shows these signs, wait for new root growth to appear — this signals it’s ready for repotting. Gently remove old substrate, trim dead roots with sanitized scissors, and place the plant in fresh bark mix. Increase pot diameter cautiously by no more than 2–5 cm to avoid overwhelming the root system.
8) Propagation and Renewal (If Applicable)
For many orchids, the safest propagation method is division during repotting. Carefully separate the orchid into sections, ensuring each division retains at least 2–3 pseudobulbs (thickened stem parts that store nutrients). Place new divisions in suitable substrate, maintaining a warm environment near 18–24°C and humidity around 60% until established. This approach renews your collection gently without shocking your orchids.
Common Problems and How to Fix Them
- Yellow leaves: Usually caused by overwatering or too little light. Increase bright indirect light to 6–8 hours. Allow top 2–3 cm of substrate to dry before watering again.
- Brown tips: A sign of dry air or inconsistent watering. Raise humidity to 60–70% by misting, using trays, or humidifiers.
- No blooms: Often due to low light or insufficient nutrients. Move your orchid closer to a window and switch to a bloom-specific fertilizer with a higher phosphorus ratio like 10-30-20.
- Root rot: Caused by soggy substrate and poor drainage. Remove the plant from its pot, trim black or mushy roots, change to fresh bark mix, and greatly reduce watering frequency.
- Pests: Orchids can attract mealybugs, spider mites, or scale. Treat weekly with neem oil or insecticidal soap. Improve airflow around the plant to hinder spider mite nests and mealybug development.
Seasonal Adjustments
Your orchid’s needs shift gently with the seasons. In summer, increase humidity naturally through more frequent misting or by placing a humidifier nearby. Water more often to compensate for hotter, drier air but always check substrate dryness first. In winter, slow watering rhythm to every 10–14 days, cease fertilization, and keep plants away from cold drafts near windows or doors.
Small, thoughtful adjustments prevent stress and keep your orchid steady throughout the year. Remember, orchids evolved in stable, tropical climates — providing warmth and consistent moisture helps imitate their natural environment indoors.
Quick Facts — Your Key Numbers
- Light: 6–8 hours bright indirect (~10,000–20,000 lux).
- Watering: Thorough once weekly; top 2–3 cm dry before watering.
- Humidity: Keep steady between 50–70% RH.
- Temperature: 18–24°C during the day, above 13°C at night.
- Fertilizer: Balanced 20-20-20 diluted 1:10 every 3–4 weeks.
- Repotting: Only when substrate decomposes or roots overflow, about every 12–24 months.
Checklist for Success
- Provide bright but indirect light; rotate orchid weekly.
- Use pots with adequate drainage; never let water pool.
- Maintain stable humidity of 50–70% and provide airflow.
- Feed lightly and regularly; flush substrate monthly to prevent salt buildup.
- Observe roots; healthy roots are firm, plump, and green.
- Prune old spikes only when they are dry or brown, cutting 1 cm above a green node if still alive.
- Repot only when bark breakdown or root crowding occurs, not by habit.
Final Words of Advice
Caring for your orchid is a journey of consistency, curiosity, and gentle observation—not perfection. Your plant will reward attentiveness and calm patience with breathtaking blooms that feel like personal triumphs. Each orchid experiences its own rhythms and subtle signals; learning to read these prepares you for long-term success. Remember, “Every orchid teaches patience — it rewards quiet observation with spectacular blooms.” Let this be your guiding notion as you nurture your growing orchid family. Keep watching, keep adjusting, and enjoy the timeless beauty only orchids offer.

Hi there — I’m Ava, the creator behind Ava Garden Tips 🌿
I’ve always been passionate about plants, flowers, and the simple joy that comes from growing something beautiful. What started as a small balcony garden has turned into a love for helping others create their own green spaces — no matter how big or small.