
Why Grow Calendula in Containers for Healing Uses?
Calendula is more than a pretty flower — it’s a versatile healing herb you can grow right on your balcony or patio. You don’t need a sprawling garden. If you have a sunny spot and a few pots, you have what it takes. The bright orange and yellow blooms aren’t just cheerful; they contain natural compounds perfect for soothing skin irritations, cuts, and inflammation. Plus, growing calendula yourself means fresh, chemical-free petals year-round. I’ll walk you through simple, reliable steps to grow healthy calendula in containers, even if you’re short on space or just starting out. By the end, you’ll feel confident to nurture this beautiful plant and harvest your own healing blooms with ease.
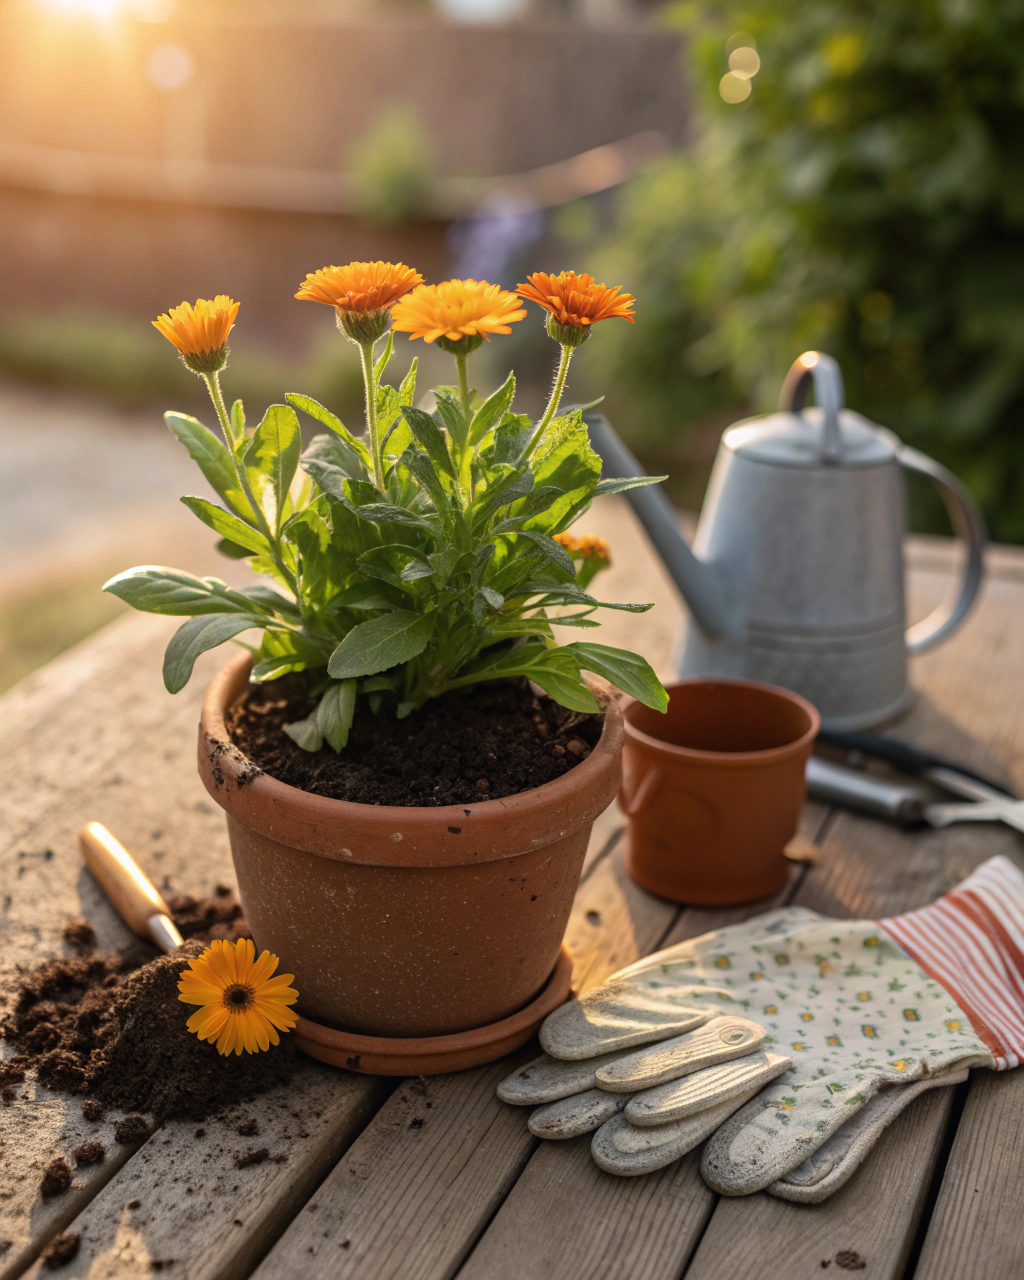
Getting Ready — What You’ll Need
Before planting, gather your essentials. Calendula thrives with the right soil, container, and conditions.
- Container size: at least 30 cm (12 in) deep and wide to support root growth and prevent waterlogging. Choose pots with drainage holes to avoid soggy soil. (Clay pots help keep roots cool in hot regions.)
- Soil mix: a well-draining blend of 70% loam, 20% organic compost, and 10% coarse sand or perlite. This composition fosters airflow and moisture retention.
- Fertilizer: use a balanced, low-nitrogen fertilizer (e.g., 5-10-10 N-P-K ratio) to promote blooms over leaf growth. Organic options like fish emulsion or seaweed extract work well.
- Light: calendula needs 6–8 hours of direct sunlight daily. Place the container on a south-facing balcony or windowsill if possible.
- Tools: seed trays or small pots for starting seeds, a watering can with a fine rose for gentle watering, a hand trowel for soil mixing, and pruning shears for harvesting.
- Seed choice: select cultivars like ‘Pacific Beauty’ or ‘Bon Bon’ for abundant flowers, or ‘Golden Orb’ for medicinal use. Fresh seeds germinate best.
Eco tip: recycle old pots or use biodegradable containers. For soil, compost your kitchen scraps to enrich your mix naturally.
Step-by-Step — How to Grow Calendula in Pots
1. Preparing Your Pot
First, clean your container thoroughly to remove pathogens or residue — use warm water and mild soap, then rinse well. Next, add a 2–3 cm (1 in) drainage layer of small stones or broken terracotta at the pot’s base. This prevents waterlogging, which causes root rot. Mix your soil components evenly, aiming for a loamy texture that feels crumbly but moist, similar to a squeezed sponge wrung just enough to hold shape but not drip.
Fill your pot with this soil mix, leaving about 3 cm (1.5 in) from the rim to avoid overflow during watering. Avoid compacting the soil too much; lightly firm it to keep air pockets without turning it into a brick. A common mistake is using heavy, clay-rich soil that hinders drainage and airflow, leading to poor root health. Also, make sure your pot has sufficient drainage holes — lack of holes is the quickest way to drown your calendula.
2. Sowing or Planting
Calendula seeds are small, dark, and slightly curved. Sow them directly into your prepared pot or start in seed trays. Plant at a depth of 0.5–1 cm (¼–½ in). Space seeds about 5 cm (2 in) apart to reduce competition. Calendula prefers a soil temperature of 15–20°C (59–68°F) for germination. If your soil is cooler, start seeds indoors on a sunny windowsill or under grow lights.
Pre-soaking seeds for 6–8 hours can soften the seed coat and improve germination speed. Once sown, press down gently and cover with fine soil. The surface should feel lightly firm but not overly dry or waterlogged.
Pro tip: Moisten the soil with a fine mist to avoid displacing seeds. Cover the pot with a clear plastic dome or cling film to preserve humidity until seedlings appear (7–14 days). Remove the cover as soon as you see green shoots to prevent fungal issues.
3. Watering and Sunlight
Calendula prefers consistently moist but never soggy soil. Water deeply until you see moisture escaping the bottom drainage holes — about 2–3 times per week during warm weather. In cooler or more humid climates, you may reduce watering frequency. Check the soil surface: it should feel dry to the touch before watering again, especially the top 2–3 cm (1 in).
If your area is hot, dry, or windy, group pots together to create a microclimate and retain humidity. Mulching with straw or shredded leaves helps suppress evaporation. In intense heat, provide partial shade during midday by moving pots under a canopy or using a light fabric cover to prevent flower and leaf scorch.
For light, your calendula needs 6–8 hours of sunlight daily — this promotes strong stems and prolific flowers. In cloudy or less sunny locations, supplement with indoor grow lights or rotate the pots regularly to catch available sun.
4. Feeding and Maintenance
Feed your calendula every 3–4 weeks with a balanced, low-nitrogen fertilizer. Too much nitrogen will cause lush leaves but fewer flowers, which reduces healing petals. Apply liquid organic fertilizers diluted according to the package — generally 1 tablespoon per liter of water. Avoid fertilizer salt buildup by flushing the soil with plain water monthly.
Once seedlings reach about 10 cm (4 in) tall, thin them by snipping weaker plants at the base. Maintain a final spacing of 15 cm (6 in) between healthy plants for good air circulation and sunlight penetration.
Regularly prune spent blooms to encourage continued flowering. Check the soil regularly; if it starts compacting, gently aerate the surface with a fork to improve oxygen flow.
“The secret is not more work — it’s regular care and observation.” I’ve found that spending a few minutes inspecting your calendula every day saves hours of problem-solving later.
5. Troubleshooting While They Grow
Keep your eyes peeled for issues:
- Yellow leaves: Usually excess nitrogen or poor drainage. Remedy by switching to a fertilizer with higher phosphorus and improving drainage.
- Stunted growth: Not enough light or too much water. Move pots to brighter spots and check soil moisture.
- Pests: Aphids and whiteflies can settle on leaves. Spray gently with insecticidal soap or use a neem oil solution.
- Root rot: Caused by constant waterlogging. Check drainage holes; trim affected roots and repot if necessary.
- Poor germination: Often seeds planted too deep. Keep depth to 0.5–1 cm and ensure soil temperature is ideal.
6. Harvesting
You’ll know your calendula is ready to harvest when flowers open fully in vibrant orange or yellow hues, around 70–90 days after sowing. Petals should feel smooth and slightly waxy, but firm to the touch — not wilted or dry. To coax richer petals, reduce watering slightly during the last week before harvest; this concentrates beneficial compounds.
Use clean, sharp scissors to snip flowers early in the morning when water content and oils are highest. Avoid pulling plants by their roots to prevent damage. Harvest regularly to encourage continuous blooming.
For storage, place freshly cut petals in a breathable container in a dark, cool place at 4–7°C (39–45°F) for up to 2 weeks. For long-term use, dry petals in a low-temperature dehydrator or freeze them in airtight bags.
Extra Tips for Perfect Results
- Companion plants: Grow calendula alongside tomatoes, carrots, basil, or lavender to repel pests and boost growth.
- Rotate your pots’ placement every season to prevent nutrient depletion and soil fatigue.
- Mulch with straw or shredded leaves to retain humidity and stabilize soil temperature.
- Use collected rainwater when possible; tap water can lead to soil hardening from minerals.
- In windy areas, cluster pots to shield plants and retain moisture more effectively.
- Under intense midday sun, provide a thin fabric shade to protect leaves without blocking all light.
Common Mistakes and How to Fix Them
- Overwatering: If roots stay soft and smell bad, stop watering and let soil dry until the top 2 cm (¾ in) is dry before resuming.
- Weak growth: Usually from too little light. Move pots to a sunnier spot or supplement with grow lights.
- Yellow leaves: Often excess nitrogen fertilizer. Use one with a higher phosphorus ratio.
- Poor germination: Seeds planted too deep. Limit planting depth to 0.5–1 cm (¼–½ in).
- Misshapen roots: Soil compacted and lacking airflow. Mix in coarse sand or perlite for better aeration.
Harvest and Storage
When harvesting, gently cut flowers with pruning shears to avoid damaging stems or roots — a clean cut promotes continued growth. Handle petals carefully; bruised or crushed petals lose healing compounds faster.
Fresh petals store best in a cool, dark environment at 4–7°C (39–45°F) and moderate humidity. Use within 2 weeks for maximum potency. For longer storage, dry petals at temperatures below 40°C (104°F) until brittle and store airtight in a dark jar. You can also freeze petals in sealed bags for up to 6 months.
Don’t forget to save seeds for next season. Wait until seed heads turn brown and feel dry, then collect and store in a cool, dry place inside paper envelopes.
What Success Looks Like
Imagine holding your first handful of bright, fragrant calendula petals, warm from the sun and silky to the touch. You’ll see how healthy leaves are vibrant green, sturdy stems upright, and flowers bursting with color. A single 30 cm (12 in) pot can yield 1–2 kg (2–4 lb) of petals over the season — plenty for soothing creams and balms.
This success isn’t just about the plant. It’s the quiet satisfaction of daily care, a connection to nature, and knowing your efforts result in natural healing. Each bloom is a reminder that patience, attention, and love grow more than flowers — they grow resilience.
Mini Recap — Your Success Checklist
- Pot depth: minimum 30 cm (12 in).
- Soil mix: 70% loam, 20% compost, 10% sand or perlite.
- Watering: 2–3 times per week, adjust by touch.
- Sunlight: 6–8 hours daily.
- Fertilizer: every 3–4 weeks, low nitrogen.
- Harvest: after 70–90 days.
Closing Reflection
Every plant you grow teaches you something new. Calendula is no different. Don’t rush its pace — watch how it responds to your care, adjust your watering or light as needed, and enjoy this simple act of nurturing. This steady harmony between you and your plant is what creates a successful garden. Remember, it’s not about perfection. It’s about consistent, loving attention. That’s what makes you a gardener.

Hi there — I’m Ava, the creator behind Ava Garden Tips 🌿
I’ve always been passionate about plants, flowers, and the simple joy that comes from growing something beautiful. What started as a small balcony garden has turned into a love for helping others create their own green spaces — no matter how big or small.