
Why Grow Chrysanthemums Indoors in Containers?
Chrysanthemums are a joy to grow, especially indoors. Their vibrant blooms—ranging from creamy whites to deep reds and sunny yellows—bring life to any room in late autumn when outdoor gardens begin to fade. Growing chrysanthemums in containers means you can enjoy their striking texture and color on a balcony, windowsill, or sunroom, even if space is tight. You don’t need acres of garden to succeed; with just a few pots and the right care, you’ll nurture beautiful flowers that brighten your home and your mood. This guide will give you clear, practical steps to grow healthy, blooming chrysanthemums indoors—handling common concerns like space, soil, and pests along the way. You can do this, and I’m here to walk you through every step.
Getting Ready — What You’ll Need
To start growing chrysanthemums indoors, gather the following essentials — each with a purpose:
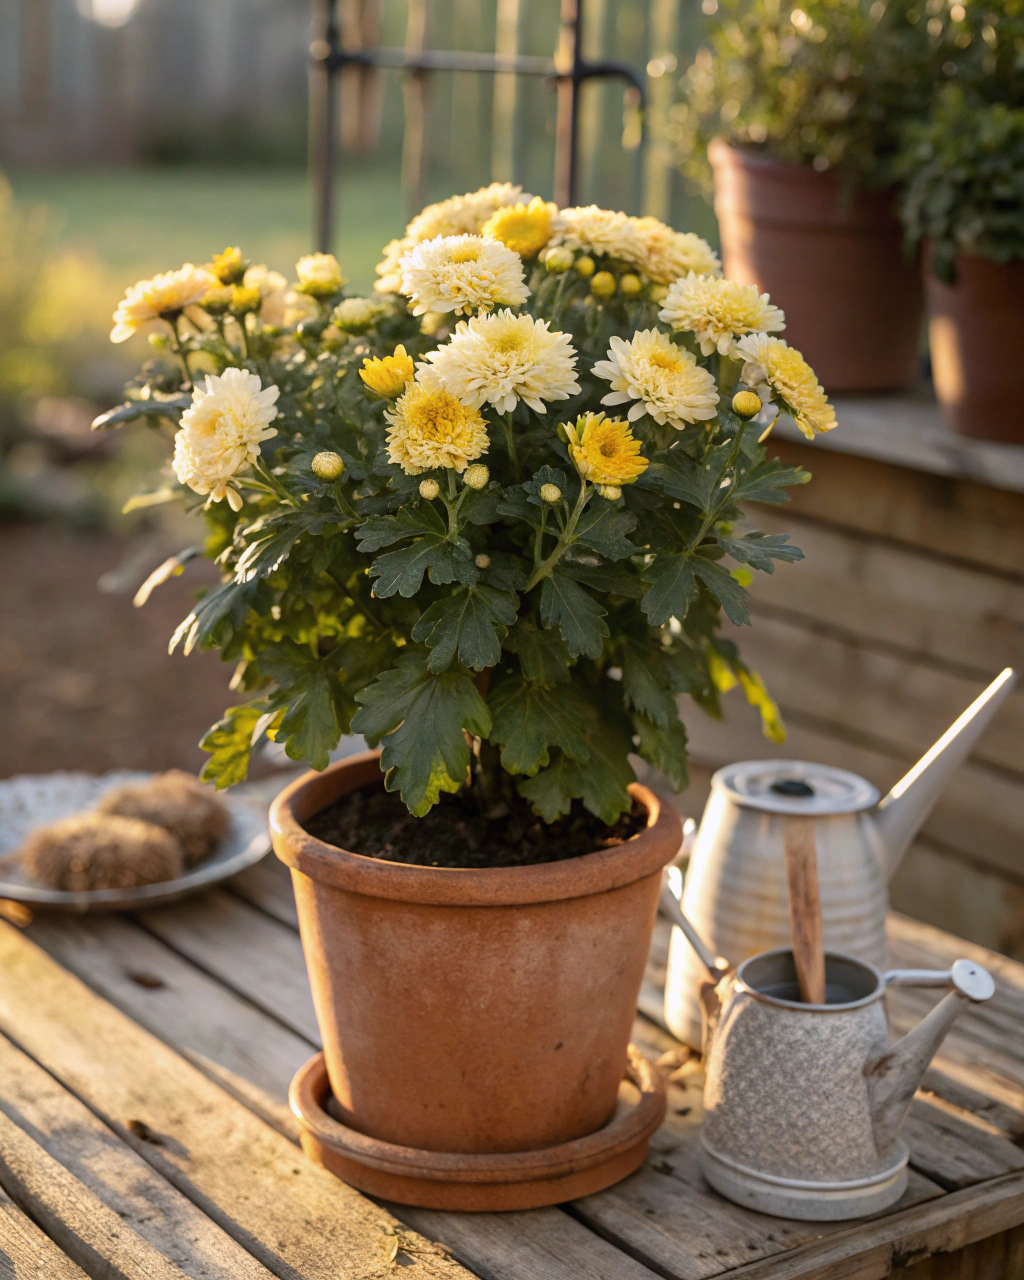
- Container: At least 30 cm (12 inches) deep to provide ample root space. Containers with drainage holes are crucial to prevent waterlogging. (If you’re on a budget, repurpose cleaned plastic buckets or large yogurt tubs—just drill drainage holes.)
- Potting soil: A well-draining mix, ideally 70% loam, 20% compost, and 10% coarse sand or perlite. This balance ensures nutrients, moisture retention, and airflow. Avoid garden soil; it compacts and drains poorly indoors.
- Fertilizer: A balanced, low-nitrogen formula such as a 10-20-10 NPK or a liquid seaweed extract. Nitrogen encourages leafy growth at the expense of blooms, so keep it moderate.
- Variety: Choose container-friendly cultivars like ‘Sheffield,’ ‘Clara Curtis,’ or multi-flowered pot mums. These are bred for compact growth and prolific flowering.
- Lighting: Chrysanthemums crave 6–8 hours of bright sunlight daily. A south-facing window is ideal, or supplement with a grow light if natural light is insufficient.
- Watering tools: A watering can with a narrow spout helps you control soil moisture without overwatering.
- Pruning shears: For thinning and deadheading spent flowers.
- Optional: Clay pots (retain cooler root temperatures in hot climates), mulch (straw or shredded leaves), and neem oil or insecticidal soap for natural pest control.
Each item plays a key role: containers provide space, soil feeds roots and keeps moisture balanced, fertilizer ensures blooming, light fuels photosynthesis, and tools make maintenance easier. Having these ready makes your chrysanthemum journey smooth and enjoyable.
Step-by-Step — How to Grow in Pots
1. Preparing Your Pot
First, clean your container thoroughly using warm water and a mild detergent to remove any residues or pathogens. Rinse well. Proper hygiene prevents diseases that can stunt growth.
Next, add a drainage layer of at least 3–5 cm (1–2 inches) of coarse gravel or broken pottery shards at the bottom. This prevents water accumulation around the roots—critical to avoid rot.
Fill your pot with your prepared soil mix, leaving about 3 cm (1 inch) from the rim. Lightly firm the soil, but don’t compact it—roots need air. The soil should feel like a sponge that’s been wrung out: moist but not dripping.
A critical mistake is ignoring drainage or compacting the soil too tightly, which suffocates roots and invites diseases. Also, pH should ideally be slightly acidic to neutral—between 6.0 and 7.0. You can check this cheaply with a home kit.
2. Sowing or Planting
If you’re starting from seed, sow chrysanthemum seeds on the soil surface and cover lightly with 0.5–1 cm of soil or fine vermiculite. The seeds need warmth—ideally 20–22°C (68–72°F)—to germinate. Keep soil evenly moist but not soggy. You’ll see tiny green shoots in about a week.
Pro tip: Pre-soak seeds for 4 hours in lukewarm water to soften the seed coat and speed germination.
If planting nursery transplants or cuttings, dig a hole deep enough to cover roots without crowding. Space multiple plants 20–30 cm (8–12 inches) apart in a wide container to encourage airflow and prevent disease. Feel the soil around each root ball—it should be moist but firm.
3. Watering and Sunlight
Water chrysanthemums deeply until you see moisture escaping through drainage holes, about 2–3 times per week in warm indoor conditions. Avoid water pooling on the surface. The soil should never be soggy. Stick your finger about 5 cm deep to check moisture: if it feels dry at that depth, it’s time to water.
During hot or dry spells, increase watering slightly and group pots to create localized humidity. Using mulch on the soil surface reduces evaporation.
For sunlight, aim for 6–8 hours of direct or bright indirect light daily. If light is limited, use a full-spectrum grow light placed 15–30 cm (6–12 inches) above the plants for 10-12 hours a day. Rotate pots weekly to prevent lopsided growth.
4. Feeding and Maintenance
Feed your chrysanthemums with fertilizer every 3–4 weeks. Use a balanced, low-nitrogen fertilizer to encourage flowering rather than leafy growth. Liquid feeds like seaweed extracts or diluted fish emulsion work well.
Prune regularly to promote bushiness and prolong blooms. Thin thinner or leggy stems by pinching back the tips when plants are about 15 cm (6 inches) tall—this encourages more branches and flowers. Deadhead spent flowers to direct energy into new growth.
Loosen the soil surface periodically with a small fork to maintain aeration. Overly compacted soil limits roots’ oxygen supply and water uptake.
Keep an eye on your plants’ overall health: pale or yellow leaves can indicate nutrient imbalance or overwatering. Adjust your care accordingly.
“The secret is not more work — it’s regular care and observation.” Learning your plants’ rhythms helps you catch issues early and enjoy steady growth.
5. Troubleshooting While They Grow
If leaves turn yellow and soft, suspect too much nitrogen or poor drainage. Add compost or a liquid seaweed feed weekly and ensure your pots’ holes aren’t blocked.
Slow or stunted growth? Move the pot to a brighter spot, as chrysanthemums thrive in good light.
Notice white cottony patches or sticky residue? These can signal pests like mealybugs or aphids. Spray with insecticidal soap or diluted neem oil immediately.
If soil stays soggy between waterings, check drainage layers and holes. Consider repotting if roots smell musty or mushy.
6. Harvesting
Chrysanthemums bloom in roughly 70–90 days after sowing or planting. Flowers are ready for harvest when petals are fully open and firm—vibrant in color without browning edges.
A helpful tip: reduce watering in the final week before harvest to concentrate flower color and scent.
When harvesting, use sharp scissors or shears to cut the flower stem about 2 cm above the base without disturbing roots.
Store harvested blooms in a cool, dark place at 4–7°C (39–45°F) with high humidity to extend their vase life up to two weeks. Alternatively, dry the flowers by hanging them upside down in a dark, airy place for long-term storage.
Extra Tips for Perfect Results
- Plant companion herbs like lavender, basil, or oregano nearby—they help deter pests naturally and add pleasant aromas.
- Rotate pots each season to prevent soil fatigue and reduce pest buildup.
- Apply mulch such as straw or shredded leaves to retain soil moisture and stabilize temperature.
- Use rainwater if available—tap water can contain minerals that harden indoor soil over time.
- Cluster pots together in windy areas for stability and to create a mini microclimate with shared humidity.
- In very hot indoor spots, add a sheer fabric shade around midday to protect delicate blooms from scorching.
Common Mistakes and How to Fix Them
- Overwatering: Roots become soft and rot. Let the top 2 cm (0.8 inches) of soil dry before watering again to keep roots healthy.
- Weak growth: Lack of light causes lanky stems. Move plants closer to a bright window or supplement with a grow light.
- Yellow leaves: Too much nitrogen fertilizer. Switch to a bloom-boosting feed with higher phosphorus content.
- Poor germination: Seeds planted too deep. Sow at a maximum depth of 1 cm (0.4 inches) to ensure sprouting.
- Misshapen roots: Soil is too compact or heavy. Mix in 10% coarse sand or perlite to improve airflow and drainage.
Harvest and Storage
When harvesting chrysanthemums, be gentle. Hold the stem firmly and cut just above the soil line or support point to avoid damaging nearby roots or stems. The flowers should feel firm, petals crisp, and release a fresh, herbal scent.
Store harvested blooms in a cool location—ideally between 4 and 7°C (39–45°F)—with high humidity (about 85%) to keep them fresh for up to 2 weeks.
If you want to preserve flowers longer, consider drying them by hanging upside-down in a dark and dry place for 2–3 weeks. Alternatively, drying petals can be used for potpourri or tea blends.
Saving seeds is easy: allow some flower heads to dry fully on the plant, then shake or rub to collect tiny seeds in a paper envelope. Store seeds in a cool, dry place until next season.
What Success Looks Like
Picture this: you lean over your container and gently pull a deep green stem capped with a firm, brightly colored chrysanthemum bloom. The subtle herbal fragrance fills the air, and you feel a quietly proud satisfaction. Your consistent care—watering, feeding, pruning—has blossomed into this living proof that patience and attention pay off.
Expect yields of about 1–2 kg (2–4 lb) of flowers per large container by the end of the season, enough to brighten your home or share with friends.
Success isn’t just about the harvest. It’s found in watching new shoots unfurl, adjusting care after a setback, and connecting with the gentle rhythms of nature inside your home.
Mini Recap — Your Success Checklist
- Pot depth: At least 30 cm (12 inches) for healthy roots.
- Soil mix: 70% loam, 20% compost, 10% sand/perlite for drainage and nutrition.
- Watering: Deeply, 2–3 times per week—adjust based on soil moisture.
- Sunlight: Provide 6–8 hours of bright light daily.
- Fertilizer: Feed every 3–4 weeks with low-nitrogen formula.
- Harvest: Cut blooms after 70–90 days, when petals are fully open.
Closing Reflection
Remember, growing chrysanthemums indoors is less about perfection and more about consistent, thoughtful care. Every plant you tend teaches you a little more about timing, patience, and observation. Don’t rush the process. Pause to feel the cool soil beneath your fingers, notice the changing colors, and breathe in those subtle floral notes. This connection, above all, makes you a gardener. Keep watching, adjusting, and enjoying the journey—your indoor chrysanthemum garden is a testament to your dedication and love of nature.

Hi there — I’m Ava, the creator behind Ava Garden Tips 🌿
I’ve always been passionate about plants, flowers, and the simple joy that comes from growing something beautiful. What started as a small balcony garden has turned into a love for helping others create their own green spaces — no matter how big or small.