
Introduction
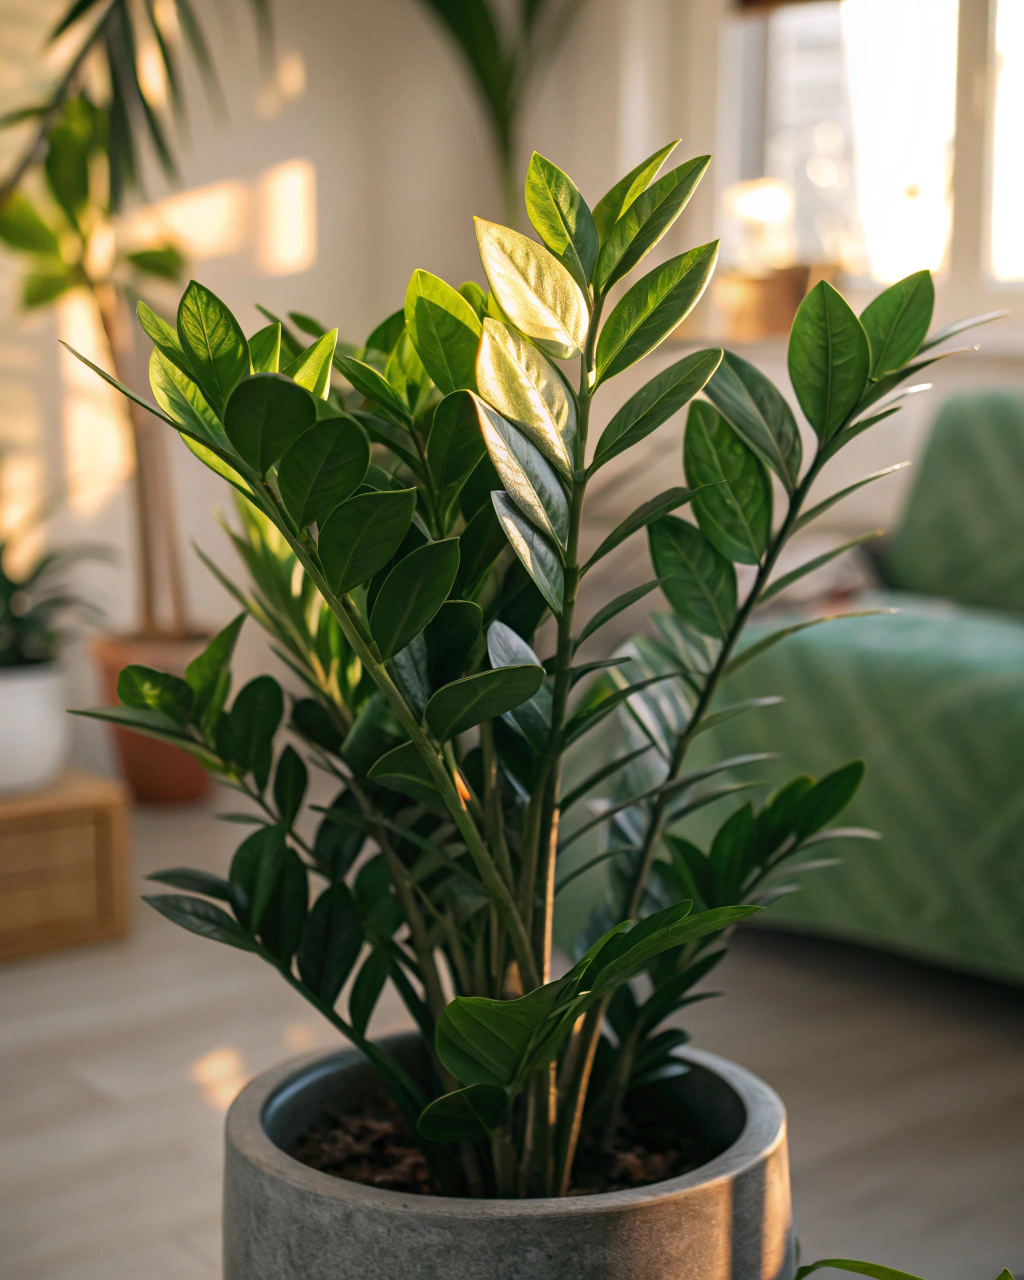
Caring for your ZZ plant (Zamioculcas zamiifolia) isn’t just about keeping it alive; it’s about encouraging vibrant growth and a lasting presence in your home or balcony garden. This hardy plant is known for its glossy, architectural leaves and resilience, but thriving with style requires a bit more than just a glance and a casual water splash. In this guide, you’ll gain the confidence to nurture your ZZ plant so it grows strong, stays lush, and brightens your space for years. You don’t need a greenhouse for this—just a dedicated routine and a keen eye for what your plant’s telling you. Let’s walk together through every step, so your ZZ plant truly thrives.
Preparing the Perfect Setup
Before bringing your ZZ plant home or moving it to a new pot, it’s crucial to set up the perfect environment where it can flourish. The right container, soil mix, lighting, temperature, humidity, and fertilizer form the foundation for healthy growth and resilience.
- Pot: Select a container with a diameter at least 20–25 cm for an average adult ZZ plant. The pot must have multiple drainage holes. Water-loving pots without drainage, such as decorative ceramic ones without holes, retain moisture and risk root rot. If your environment tends toward higher heat, choose a porous clay pot—it will naturally wick moisture and keep the root zone cooler, protecting your plant from heat stress.
- Substrate: Use a well-draining mixture composed roughly of 50% potting soil, 30% perlite, and 20% coarse sand. This combination ensures moisture retention yet prevents waterlogging. ZZ plants prefer a slightly acidic to neutral pH; aim for a substrate pH of 6.0–7.0. Avoid dense or heavy soil—you want the mix to feel light and airy under your fingers; it should crumble softly rather than compact into a solid clump.
- Light: ZZ plants thrive in bright indirect light, ideally receiving between 6–8 hours daily. This corresponds to about 10,000–20,000 lux. Keep your plant near an east-facing window where morning rays filter gently through a curtain. If your sunlight is stark or direct for extended periods, a sheer curtain softens the intensity, preventing leaf burn while encouraging strong, vibrant leaf color.
- Humidity: ZZ plants are surprisingly adaptable but prefer a relative humidity range between 50–70%. You can maintain this by grouping plants, placing a humidity tray with pebbles and water beneath the pot, or running a humidity tray nearby, especially on dry winter days when heaters can desiccate the air.
- Temperature: Maintain daytime temperatures in the range of 18–24°C (65–75°F), with nighttime temperatures rarely dipping below 13°C (55°F). Sudden drops or drafts can trigger stress responses, like leaf blackening or drop. Keep your ZZ plant in a location shielded from cold drafts or heating vents that create uneven temperature shifts.
- Fertilizer: Your best bet during the active growth phase is a balanced liquid fertilizer with an N-P-K ratio of 20-20-20. Dilute it to a weak solution of 1:10 with water — which means one part fertilizer to ten parts water. Feed your plant every 3–4 weeks during spring and summer, reducing or stopping fertilization in the dormant winter months. For the eco-conscious gardener, organic liquid alternatives derived from seaweed or compost extract work well, offering gentle, slow-release nutrition without synthetic chemicals.
Step-by-Step Care Routine
1) Understanding the Plant’s Cycle
Your ZZ plant grows at a measured, steady pace, typically showing most activity during spring and summer. It’s important to recognize that even this tough plant has rest periods when growth slows down, usually in the cooler months. During active phases, the stems thicken and new leaves emerge with a glossy sheen. In the rest period, leaves may rest in place, but photosynthesis is still happening, albeit more slowly.
I once made the mistake of overwatering, assuming the plant’s dormant phase meant it needed constant hydration to ‘wake it up.’ Instead, the roots started to rot, turning mushy and black beneath the soil’s surface. Watering less, allowing the soil to dry a bit between sessions, revived the plant fully within weeks. Rest periods are crucial recovery times—giving your ZZ plant space keeps the roots from sogginess and encourages lush new growth in the active seasons.
2) The Right Pot and Substrate
Knowing when your ZZ plant needs repotting is key to good health. A telltale sign is roots crowded tightly and circling the pot, or soil that compacts and won’t drain well. If the soil smells sour or feels soggy a few days after watering, it’s a signal for a fresh substrate. Your goal is a light, airy mix that allows oxygen to reach the roots and water to drain freely. Avoid dense, heavy soils, which retain moisture for too long and create an environment ripe for fungal diseases.
By gently lifting the plant from its pot, you can feel the root ball. Healthy roots are firm and plump with some white or light tan coloration. If roots are brown, mushy, or smell unpleasant, repot immediately. When refreshing the potting medium, remove about one-third of the old soil to eliminate buildup of salts or decayed matter, then blend in fresh substrate. If your plant’s still comfortable and the roots are healthy, wait another year before repotting—it’s less stressful and allows growth cycles to proceed undisturbed.
3) Watering the Smart Way
Watering your ZZ plant correctly means balancing moisture without drowning the roots. The ideal is thoroughly watering once a week during the active growing season—but only when the top 2–3 cm of soil is dry to the touch. This dryness check is your plant’s natural cue to breathe, rather than suffocate, its root system.
Use lukewarm water, slightly soft if you can (rainwater or filtered water works best), to avoid salt and mineral buildup in the soil. When watering, soak the soil until water starts to drain freely from the bottom drainage holes—this flushes excess salts and prevents them from accumulating near the roots.
Adjust watering frequency in winter: reduce it to every 10–14 days as growth slows, and be especially vigilant if air inside your home is dry or warm from heating systems. To know when your plant needs water, try the weight test by lifting the pot after watering and again a few days later; a light pot indicates it’s time to hydrate again, while a heavy one means the moisture remains.
4) Light, Temperature, and Humidity Balance
Striking the right balance between light, temperature, and humidity makes all the difference. Your ZZ plant thrives in bright but filtered light for roughly 6–8 hours daily. An east-facing window is ideal because it delivers gentle morning light, warming but not scorching. A subtle rotation once a week encourages even leaf development and prevents your plant from leaning to one side, which can stress stems.
Keep daily temperatures stable within 18–24°C (65–75°F) and nights above 13°C (55°F). Avoid areas near air conditioners, heaters, or cold drafts. For humidity, maintaining 50–70% relative humidity helps prevent leaf edges from crisping. Use a humidifier if your living space dries out seasonally, or cluster plants together to create a microclimate. If leaves show yellow tips or begin to wrinkle, it’s often a sign of environmental imbalance that you can quickly correct—adjust light levels or increase humidity.
5) Feeding and Fertilization
Balanced nutrition is essential but less is more when it comes to your ZZ plant. Use a liquid fertilizer with an equal 20-20-20 ratio, diluting it to one-tenth strength (1:10), every 3–4 weeks during the active growth months from spring to early autumn. This slow, steady feeding encourages lush foliage and healthy root development without overloading the soil with salts.
During winter dormancy, pause fertilization entirely to let your plant rest normally without excess nutrients that might stress roots. Signs of nitrogen deficiency include pale or yellowing leaves, while excess fertilization often produces a crusty white deposit on the soil surface—indicating salt buildup. If you spot this, thorough flushing with pure water once a month helps clear these salts and maintain healthy growth conditions.
6) Pruning, Cleaning, and Post-Bloom Maintenance
Though ZZ plants do not bloom frequently indoors, pruning remains an important part of their care, especially to remove old, yellowed leaves or damaged stems. Use sharp, clean shears sanitized with isopropyl alcohol before and after pruning to prevent spreading disease. Cut any dead or yellowed stems down to the soil line to encourage fresh growth. Green stems that need tidying can be trimmed back just above a healthy node; this encourages branching and fuller appearance.
Keep your ZZ plant’s leaves dust-free by wiping them gently every two weeks with a soft, damp cloth. Clean leaves absorb light better, enhancing photosynthesis and overall vigor. Remember, success isn’t about marathon effort: “The secret isn’t doing more—it’s observing better.” Paying attention to your plant’s signals lets you intervene exactly when needed, avoiding unnecessary steps.
7) Repotting — Only If Needed
Resist the urge to repot your ZZ plant on a schedule. Instead, let its growth and root health dictate timing. Repot only when you observe that roots have completely filled the pot, circling and pressing against the sides, or if the substrate has degraded and no longer drains well. Generally, this happens every 12–24 months.
When repotting, select a new pot only slightly larger—add between 2–5 cm diameter to the original size. Larger pots tend to hold excess moisture, which ZZ roots dislike. Carefully remove the plant, shake off excess old soil, and trim off any black or mushy roots with sterilized pruning shears. Place it gently in fresh substrate, ensuring roots sit comfortably without being crushed. Water sparingly in the coming weeks to allow roots to settle.
8) Propagation and Renewal (If Applicable)
The simplest, safest way to propagate your ZZ plant is through division when repotting. This method involves separating the rhizomes—thick, potato-like root structures—so that each division includes at least two or three healthy stems with attached rhizomes.
Keep newly divided plants in stable conditions: temperatures between 18–24°C and relative humidity around 60%. Avoid direct sunlight while the divisions establish new roots. Water sparingly and watch closely for slow new growth, which signals successful propagation. Patience here pays off, as ZZ plants grow slowly but steadily once established.
Common Problems and How to Fix Them
- Yellow leaves: This usually means overwatering or insufficient light. Step up to 6–8 hours of bright indirect light near a window, and make sure the top 2–3 cm of soil dries before watering again.
- Brown tips: Often a symptom of dry air or inconsistent watering. Raise humidity levels to 60–70% using trays or a humidifier. Avoid sudden water deprivation.
- No new growth: Could be lack of sufficient light or fertilizer. Move your plant closer to an east or north-facing window. Consider switching to a bloom-promoting fertilizer with an N-P-K ratio of 10-30-20 for a limited time.
- Root rot: Caused by soggy, poorly draining substrate. Remove the plant, trim all mushy roots, replace old soil with well-draining mix, and water less frequently.
- Pests: ZZ plants can occasionally develop mealybugs or spider mites. Treat infested areas weekly with neem oil or insecticidal soap, and improve airflow around your plant to discourage pests.
Seasonal Adjustments
Seasonal changes influence your ZZ plant’s needs in subtle but important ways. In hot summer months, increase watering slightly and raise humidity levels by misting or using a humidifier. Light might be stronger in summer, so monitor leaves for any signs of scorching and adjust position if necessary.
In winter, when daylight shortens and temperatures drop, reduce watering to once every 10–14 days. Skip fertilizing to let the plant rest. Keep your ZZ plant away from cold drafts and heating vents, which can dry out leaves. These small adjustments keep your plant stable and encourage healthy growth cycles year after year.
Quick Facts — Your Key Numbers
- Light: 6–8 hours bright indirect (10,000–20,000 lux).
- Watering: once weekly; top 2–3 cm dry before watering.
- Humidity: 50–70% relative humidity.
- Temperature: 18–24°C (65–75°F) day; above 13°C (55°F) night.
- Fertilizer: 20-20-20 liquid diluted 1:10, every 3–4 weeks.
- Repotting: only when substrate degrades or roots overflow, about every 12–24 months.
Checklist for Success
- Provide bright, indirect light; rotate plant weekly.
- Use pots with excellent drainage; no standing water.
- Maintain steady humidity between 50–70% and ensure airflow.
- Feed lightly and regularly during growth; flush monthly.
- Observe and physically check roots—they’re your plant’s vital sign.
- Prune only dead or fully dried stems; sanitize your tools.
- Repot cautiously and only when necessary; avoid oversizing.
Final Words of Advice
Keeping your ZZ plant flourishing is less about achieving perfection and more about developing a consistent rhythm of care. These plants respond beautifully to attention and careful observation. You’ll learn its quiet signals—the slight leaf curl, the gentle shine of healthy green—that let you know when to adjust a routine or change its spot. Every ZZ plant grows at its own pace, teaching you patience in return for your effort.
Remember, the journey you share with your plant is as rewarding as the outcome. With steady hands and a warm eye, you’ll watch your ZZ become a vibrant, living testament to your nurturing spirit—a lasting companion in your indoor oasis.

Hi there — I’m Ava, the creator behind Ava Garden Tips 🌿
I’ve always been passionate about plants, flowers, and the simple joy that comes from growing something beautiful. What started as a small balcony garden has turned into a love for helping others create their own green spaces — no matter how big or small.