
Introduction
There’s something quietly magical about growing your own pothos—those glossy, heart-shaped leaves trailing gracefully from pots in your home or balcony. Propagating pothos in water not only renews your plant collection but offers a rewarding glimpse into the miracle of growth right before your eyes. Successfully caring for your pothos doesn’t require a greenhouse or specialized gear, just steady observation and simple steps that anyone can follow. Together, we’ll walk through exactly how to propagate and nurture your pothos in water, transforming cuttings into lush greenery that invigorates your space and mood.
Preparing the Perfect Setup
Before you even snip that first vine, it’s essential to create an environment where your pothos cuttings can thrive effortlessly. A good setup lays the foundation for healthy roots and strong growth.
- Container: Choose a glass jar or clear vase with a mouth diameter of about 8–10 cm. It’s critical the container has no narrow neck or tight opening to allow your cuttings ample room and airflow. A clear container helps you observe root development and water clarity, preventing unseen rot. Avoid containers that can trap heat; glass is ideal because it stays cool and doesn’t leach chemicals into the water.
- Water: Use soft, lukewarm water—not cold—to avoid shocking the plant. Filtered or rainwater is perfect, maintaining a neutral to slightly acidic pH of about 6.0–6.5. Tap water with heavy chlorine or hard minerals may impair root growth, so let it sit out overnight if you don’t have filtered options.
- Light: Pothos cuttings crave bright, indirect light—about 10,000–15,000 lux or roughly 6–8 hours a day. Place your setup near an east or north-facing window, or filter harsher rays through a sheer curtain to divert direct sunlight. Too much sun causes leaves to yellow; too little slows root development.
- Temperature: Keep things steady between 18–24°C (65–75°F). Pothos are tropical plants by nature and won’t appreciate drafts or temperatures consistently below 13°C (55°F). On cooler evenings, keep your plants in warmer rooms to protect tender roots forming under the water’s surface.
- Humidity: Aim for a relative humidity level between 50–70%. If your home or balcony is dry, try grouping your pothos with other plants or placing the propagation container on a tray of moist pebbles. You’ll notice that higher humidity encourages faster root development and reduces leaf stress.
- Fertilizer: Typically, you won’t fertilize the cuttings in water until roots have developed fully and they’re transplanted into soil or substrate. However, once potting, a liquid fertilizer with an N-P-K ratio of 20-20-20 diluted at 1:10 every 3–4 weeks keeps your pothos lush and thriving. For initial water propagation, simply refreshing the water regularly keeps nutrients balanced.
If your space tends to overheat, especially in summer, consider using terracotta or clay pots once you transition the roots to soil. These natural materials allow moisture to evaporate slowly, helping to keep the root zone pleasantly cool. But while propagating in water, clear glass remains your best window into growth.
Step-by-Step Care Routine
1) Understanding the Plant’s Cycle
Pothos plants grow and rest in a subtle rhythm influenced by light and temperature. Their active growth phase peaks in warmer months, during spring and summer, when longer and brighter days encourage new leaves and roots. During this time, cuttings will develop quickly in water. Conversely, in fall and winter, the plant slows down, focusing energy on conservation rather than growth.
Embracing this cycle helps you anticipate the needs of your cuttings or mature plants. For instance, I once made the mistake of assuming water propagation needed constant, nearly daily watering adjustments after taking cuttings. Instead, I was refreshing water too frequently, exposing developing roots to fluctuating oxygen levels, which actually delayed rooting. Now, I let the water sit for at least a week unless it turns cloudy or smells stale, understanding that less disturbance fosters stronger roots.
2) The Right Pot and Substrate
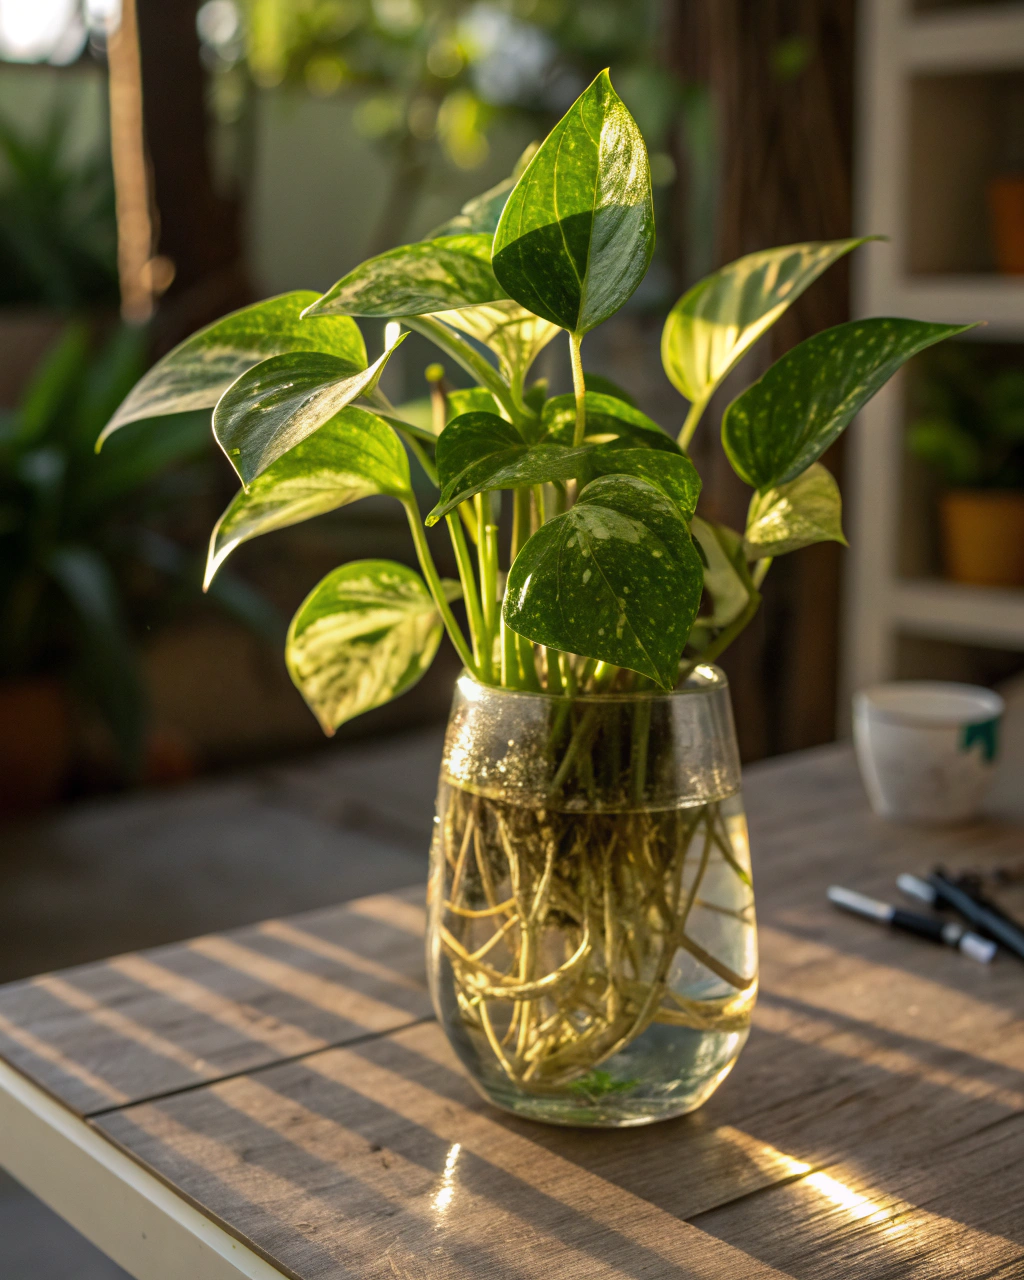
When propagating pothos in water, the choice of container acts as your first substrate. Because roots develop submerged, the medium is water itself—oxygenated and refreshed regularly. You want a container that’s spacious enough for at least 3–4 nodes below waterline, ensuring room for roots to spread without cramping or tangling prematurely.
Once roots reach about 5–7 cm long, many gardeners transition cuttings to pots. At this point, choose a container with drainage holes and a lightweight substrate such as a mix of peat moss, perlite, and coarse sand (~50:30:20 ratio) or an aroid-specific mix containing bark and sphagnum moss. The pH should remain slightly acidic, ideally between 5.5 and 6.5, to mimic the plant’s natural tropical environment.
A common error when potting pothos is using dense, heavy potting soil. This compromises aeration and traps water around the roots, inviting rot and suffocation. The substrate should feel airy and almost sponge-like, retaining moisture but allowing excess to drain freely. Touch the soil: it should crumble slightly rather than feel compact.
3) Watering the Smart Way
Watering pothos in water propagation is as simple as keeping the foliage nodes submerged in clean water. Change the water every 7–10 days or sooner if it looks cloudy or emits an odor. Use lukewarm water to encourage root growth and avoid cold shock to tender roots.
When your rooted pothos graduate to soil, follow a watering routine that feels intuitive but precise: water thoroughly only when the top 2–3 cm of the medium is dry. You can check this by touch; dry soil is lighter and crumbly, while moist soil clings lightly to your fingers. The “weight test” is invaluable here—you’ll feel the difference in pot weight between watered and dry soil, giving you a practical guiding sense.
Adjust watering frequency with the seasons. During winter when growth slows, your pothos requires water less often—about every 10–14 days. In hotter, drier conditions (above 24°C (75°F)), the plant drinks more, so watering every 5–7 days is appropriate. Regardless, never let water sit beneath roots to avoid root rot.
4) Light, Temperature, and Humidity Balance
The triumvirate of light, temperature, and humidity defines your pothos’s overall health. Bright indirect light triggers photosynthesis and root stimulation without scorching leaves. Aim for about 6–8 hours daily, positioned near an east-facing window for gentle morning sun or diffused northern light.
Temperature stability is non-negotiable: daytime temperatures between 18–24°C keep metabolic processes running smoothly, while nights shouldn’t dip below 13°C, which might cause stress seen as limp leaves or slowed root growth. Pothos is somewhat adaptable but thrives best under consistent conditions.
Humidity between 50 and 70% mirrors their tropical origin. Low humidity manifests as dry burnt leaf tips and curled edges—signs to raise moisture levels. You can boost humidity by misting leaves lightly in the mornings or placing the plant atop pebble trays with water between the stones. Just be careful not to leave the base of the plant soaking in standing water, which invites fungal problems.
Remember to turn your cutting or plant approximately once a week. This simple move encourages balanced growth, as all sides receive equal light exposure rather than leaning toward one window.
5) Feeding and Fertilization
During water propagation, you typically don’t add fertilizer until roots have formed and the plant is potted. At this transition, fertilization nurtures the new root system and stimulates leaf growth. Use a balanced liquid fertilizer with a ratio of 20-20-20, meaning equal parts nitrogen, phosphorus, and potassium, diluted at a 1:10 ratio with water. Feed every 3–4 weeks during active growth—from spring through early fall.
Stop fertilizing in winter when your pothos naturally slows down, conserving energy. Signs your plant needs feeding include paler leaves lacking vibrancy and slowed growth, while white crust or buildup on the soil surface suggests over-fertilization.
To protect your plant and prevent salt accumulation caused by fertilizers, flush the potting medium monthly with pure water. This clears residual minerals and allows roots to breathe freely.
6) Pruning, Cleaning, and Post-Bloom Maintenance
Pruning your pothos encourages fuller, bushier growth and prevents legginess. Trim back vine tips with sharp, clean shears, cutting about 1 cm above a leaf node so new shoots can arise. If you notice yellowing or brown leaves on the vines, removing these helps redirect energy to fresh growth and reduces disease risk.
Keeping foliage clean is just as important. Dust blocks light and reduces photosynthesis, while sticky residues can attract pests. Wipe leaves gently every two weeks with a damp, soft cloth, feeling their waxy texture rejuvenate under your touch. Always sanitize your pruning tools with rubbing alcohol before and after use to prevent pathogen spread.
As I often say, “The secret isn’t doing more—it’s observing better.” By watching your pothos’s cues closely, you’ll know precisely when and how to care for it without needless fuss.
7) Repotting — Only If Needed
Patience is a virtue in repotting pothos. Unlike succulents that demand frequent soil refresh, pothos benefit when you only repot as the soil breaks down or roots overcrowd the container. Check your plant every 12–24 months for signs like circling roots pushing out drainage holes, or the potting medium beginning to compact and smell sour.
When repotting, gently loosen root balls but avoid aggressive pulling. Remove any decayed or mushy roots with sterilized shears. Increase pot diameter by no more than 2–5 cm to prevent excess moisture retention and reduce transplant shock.
Lightly mist roots before placing in fresh substrate, then water thoroughly but let excess drain. Keeping the root ball supported without bending or breaking roots ensures your pothos bounces back quickly to vigorous growth.
8) Propagation and Renewal (If Applicable)
Pothos propagation in water is as straightforward as it gets. Select a healthy vine and cut a section with at least 4-6 leaves and 3-4 nodes. Nodes are the small bumps along the vine where roots will emerge. Remove leaves closest to the bottom node to prevent rotting underwater.
Place cuttings in your prepared container filled with lukewarm water, fully submerging the nodes but keeping leaves above water to avoid decay. Maintain temperature between 18–24°C and humidity near 60% to encourage root development in about 2–4 weeks, although patience is key.
Once roots reach 5–7 cm, you can pot the cuttings in soil or continue growing in water indefinitely — pothos are versatile that way. Refresh water weekly, and watch new leaves unfurl to celebrate your success.
Common Problems and How to Fix Them
- Yellow leaves: Usually a sign of overwatering or insufficient light. To correct, increase exposure to bright indirect light for 6–8 hours and ensure the top 2–3 cm of soil or medium dries out before watering again.
- Brown tips: Indicative of dry air or inconsistent watering. Raise humidity with a humidifier, pebble trays, or plant grouping to keep RH at 60–70%.
- No blooms: Though pothos are primarily grown for foliage, flowering is rare indoors. If your plant doesn’t bloom and you desire blooms, check if it’s getting enough light and fertilizer. Move closer to a window and consider a bloom booster fertilizer like 10-30-20 for phosphorus support.
- Root rot: Caused by soggy substrate or stagnant water. Remove the plant immediately, trim rotten roots that are brown and mushy, replace soil with fresh mix, and water more cautiously.
- Pests: Common culprits include spider mites and mealybugs. Treat with neem oil or insecticidal soap weekly until controlled. Enhance airflow around your plant to prevent recurring infestations.
Seasonal Adjustments
Caring for your pothos through changing seasons means responding to shifts in light, temperature, and humidity. Summer’s warmth and lengthened days call for more frequent watering and increased humidity to compensate for drying indoor air. Mist leaves regularly or provide humidity trays to avoid dry leaf tips.
Winter often brings shorter, cooler days; scale back watering to once every 10–14 days and pause fertilizer application. Avoid placing the plant where cold drafts or heater vents blast, as this stresses the foliage and roots.
Simple seasonal tweaks keep your pothos calm and balanced year-round, preventing stress-related issues that look alarming but are easily managed.
Quick Facts — Your Key Numbers
- Light: 6–8 hours bright indirect (approx. 10,000–20,000 lux).
- Watering: Water thoroughly once weekly; wait for top 2–3 cm of medium to dry before rewatering.
- Humidity: Maintain relative humidity between 50–70%.
- Temperature: Keep day temperatures between 18–24°C and nights above 13°C.
- Fertilizer: Use liquid 20-20-20 fertilizer at 1:10 dilution every 3–4 weeks during growing months.
- Repotting: Only when substrate breaks down or roots overflow, typically every 12–24 months.
Checklist for Success
- Place your pothos in bright but indirect light; rotate the pot weekly to encourage even growth.
- Ensure containers have excellent drainage; never let water sit underneath the roots.
- Maintain steady humidity between 50–70% and good airflow around the plant.
- Feed lightly and regularly during active growth, and flush the soil monthly.
- Regularly inspect roots; healthy roots are firm, plump, and green-white in color.
- Prune old, yellowing leaves or leggy growth, only cutting when you understand the plant’s growth points.
- Repot only when absolutely necessary—avoid the temptation to change soil too frequently.
Final Words of Advice
Caring for your pothos, especially through water propagation, isn’t about chasing perfection. It’s about tuning into your plant’s subtle signals and responding with thoughtful, consistent care. Your plant will teach you patience and attentiveness; in return, it rewards you with verdant vines that soften spaces and brighten moods.
Every pothos you nurture becomes a quiet companion, teaching the art of quiet observation and private accomplishment. So whether you’re standing beside your jars of rooted cuttings or tending mature vines spilling graciously over pots on a balcony, keep learning, keep watching, and trust that your commitment transforms bit by bit into vibrant, living beauty.

Hi there — I’m Ava, the creator behind Ava Garden Tips 🌿
I’ve always been passionate about plants, flowers, and the simple joy that comes from growing something beautiful. What started as a small balcony garden has turned into a love for helping others create their own green spaces — no matter how big or small.