
Introduction
Stopping mold from forming in your plant’s soil is a surprisingly common concern for indoor gardeners. Mold not only looks unpleasant — that fuzzy white, green, or gray layer on the soil surface — but it can also harm your plant’s roots and hinder healthy growth. If you’re growing plants in pots on your balcony or inside your home, mastering the art of mold prevention is essential for vibrant, thriving foliage. The good news? You don’t need a greenhouse or fancy equipment to keep mold at bay. With a bit of knowledge, hands-on care, and keen observation, you can maintain fresh, clean soil that supports your plants season after season. Let’s walk through everything you need to know to stop mold from forming in your plant soil and keep your leafy friends healthy and happy.
Preparing the Perfect Setup
Before we dive into care routines, preparing the right environment is your first defense against mold. Mold thrives in damp, stagnant conditions, so setting up your plant correctly will make a world of difference. Let’s review the essential tools and materials you’ll need and why each plays a role in mold prevention and overall plant health:
- Pot: Choose a container with plenty of drainage holes. This might seem obvious, but many overlook it. Standing water under the roots invites mold and root rot, so never use a pot that retains water at the base. For most indoor plants, a terracotta or unglazed clay pot works wonders because it “breathes” and helps keep the root zone drier. If your balcony or home space tends toward heat in summer, clay pots will help keep the roots cool.
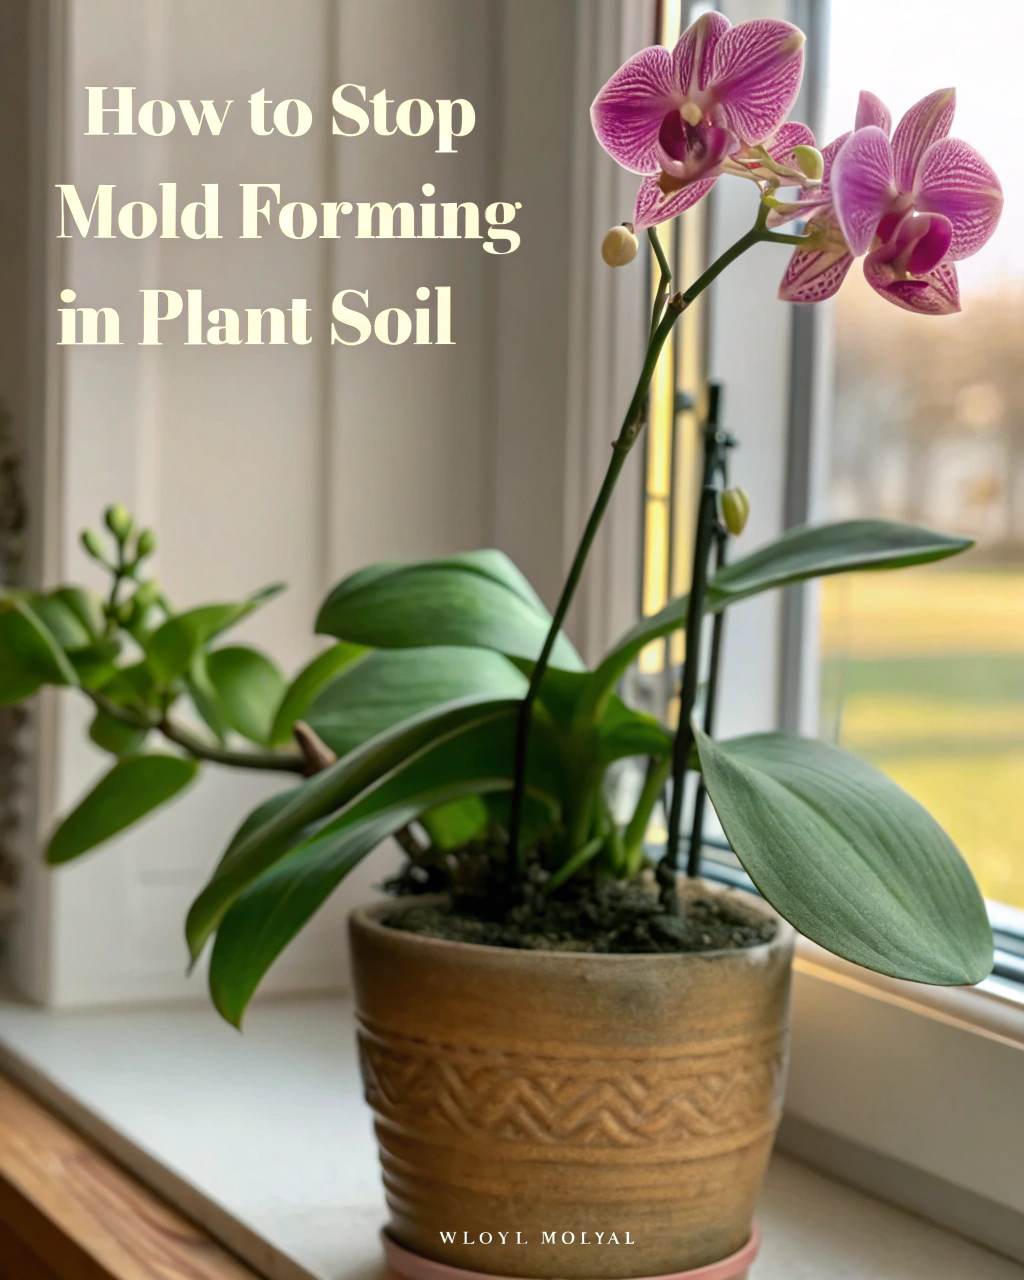
- Substrate: Your soil or growing medium should be light, well-aerated, and quick-draining. For example, a mix of 50% high-quality potting soil, 25% coarse perlite or pumice, and 25% organic matter like pine bark chips provides excellent airflow and moisture control. Aim for a slightly acidic to neutral pH within 5.5–6.5. This pH range discourages mold growth while ensuring nutrient availability. Avoid heavy garden soil or compacted mixes, which hold water and create the perfect mold incubator.
- Light: Position your plant where it receives bright, indirect light for roughly 6–8 hours daily, equating to about 10,000–20,000 lux. Direct strong sunlight can dry the surface quickly but might scorch leaves, so using a sheer curtain is a smart way to diffuse those harsh rays. Mold dislikes well-lit, moving environments, so this light balance helps.
- Humidity: Mold thrives in high humidity, especially stagnant moisture. Aim to maintain relative humidity between 50–70%. You can gently increase humidity around your plants by grouping pots, placing shallow pebble trays filled with water beneath them, or using a humidifier with a built-in timer. These methods increase air moisture without causing soggy soil, which is a mold risk.
- Temperature: Keep your plant in a spot where day temperatures hover between 18–24°C (65–75°F) and don’t fall below 13°C (55°F) at night. Mold is more active in cooler, damp settings, so maintaining warmth combined with good airflow reduces fungal growth dramatically.
- Fertilizer: Mold can flourish in nutrient-rich, moist conditions, but your plant still needs feeding. Use a balanced liquid fertilizer, such as 20-20-20, diluted at a strength of 1:10 every 3–4 weeks. Feeding stimulates root activity and soil microbial balance, which fend off mold naturally. For eco-friendly care, try organic fish emulsion or kelp extracts at similar dilution rates; these are gentle and promote a healthy rhizosphere.
Right now, take a moment to inspect your chosen pot and soil. Feel the substrate—it should be airy, not clumped; loose but not dusty. The pot should feel sturdy but light enough so you can lift to check moisture levels underneath. Setting this foundation well will make your journey toward mold-free planting much smoother.
Step-by-Step Care Routine
1) Understanding the Plant’s Cycle
Every plant has natural rhythms — cycles of growth, rest, and renewal — that influence how you care for it and ultimately how mold behaves in its soil. Whether you’re nurturing a leafy houseplant or flowering balcony favorite, knowing its cycle is key. For example, many common potted plants experience a growth phase in spring and summer when they use more water and nutrients, and a quieter, rest phase in fall and winter.
This cycle affects soil conditions. When growth slows, roots take up less water, and excess moisture can linger, raising mold risks. I remember once keeping a plant constantly moist during its dormant winter months, thinking it needed constant hydration. Within days, I spotted mold spreading across the soil. Only after letting the soil dry between waterings and lowering humidity did the plant bounce back. That experience taught me that understanding your plant’s natural cycle isn’t optional — it’s essential for mold prevention and overall vitality.
2) The Right Pot and Substrate
Checking if your plant needs repotting is another crucial step that directly impacts mold control. Pick up your pot and gently tilt it out of its saucer or outer container. Is the substrate crumbling or compacted? Are roots growing out of drainage holes or visibly circling inside? If the answer is yes, it’s time to repot — but if roots are firm and substrate smells fresh and earthy, you can hold off.
The substrate itself should feel dry on the surface but moist below. It should be light and airy — you want to be able to pinch it and feel individual particles, not a solid, wet mass. One common mistake I see is using dense, heavy garden soil in pots. It retains water and chokes roots, creating the perfect environment for mold and root rot. Opt for a specially formulated soilless mix or an airy blend like the one described in our setup section. Your plant’s roots will thank you, and mold will think twice about settling in.
3) Watering the Smart Way
Watering is often where mold problems begin, yet it’s also the easiest to fix with knowledge and care. The key is watering thoroughly but infrequently. Water your plant deeply once a week or whenever the top 2–3 cm of soil feels dry to the touch. Use lukewarm, soft water — room temperature water prevents shocking the roots and mimics natural rainwater, which doesn’t encourage mold.
Pour water slowly to soak the substrate evenly, then allow excess to drain fully out of the pot’s holes. Never let water pool beneath the pot because standing moisture invites mold and rot. You can perform a handy “weight test” by lifting the pot before and after watering; it should feel noticeably lighter before the next watering, signaling the soil has dried sufficiently.
Adjust this routine based on the season. In dry, hot months, water more frequently, but reduce watering in cool or humid winter conditions. Finding this balance takes practice, but once you tune into your plant’s signals, you’ll keep soil healthy and mold-free.
4) Light, Temperature, and Humidity Balance
Creating a harmonious environment of light, temperature, and humidity is your mold-fighting trifecta. Bring your plant close to an east-facing window to enjoy gentle morning sun and bright indirect light for around 6–8 hours a day. This light level supports photosynthesis, dries the soil surface between waterings, and reduces mold’s preferred damp darkness.
Temperature-wise, aim for daytime warmth between 18–24°C and nighttime no cooler than 13°C. Cool, damp areas harbor mold spores and reduce plant vigor. Keep the air moving gently if you can—a small fan on low near the plant encourages evaporation and prevents stagnant pockets where mold likes to form.
Humidity should ideally stay around 60%. If your home feels dry, use grouping or pebble trays with room-temperature water, but avoid overdoing it. Too much humidity without proper airflow or drainage creates cozy conditions for mold. Pay attention to leaf edges and bark surface. If leaves show yellow tips or wrinkled skin, it could signal humidity or watering imbalance. Adjust your environment accordingly.
5) Feeding and Fertilization
Proper feeding strengthens your plant, which in turn helps resist mold and other issues. Apply a balanced liquid fertilizer such as 20-20-20 diluted at 1:10 every 3–4 weeks during the active growing season. Avoid overfeeding, which can cause salt buildup on the substrate surface and foment mold growth.
Pause fertilizer applications during winter or when your plant is in a dormancy phase. Do monthly flushes with clean water to wash out excess salts accumulated from fertilizers. This simple step refreshes the root zone and keeps the substrate environment balanced.
Watch your plant’s leaves carefully. Pale, yellowing foliage often means a nutrient deficiency that may weaken root health and invite mold. On the other hand, a white crust on the soil surface or pot rim signals overfertilizing — time for a flush and a rest.
6) Pruning, Cleaning, and Post-Bloom Maintenance
Keeping your plant neat and its environment clean helps reduce mold spores and disease. After blooming, prune old floral spikes carefully. If the spike is still green, trim about 1 cm above a node to encourage new buds. If brown or dry, cut the spike down to the base. Always clean your pruning shears with rubbing alcohol before use — this simple hygiene step prevents transferring fungi or bacteria.
Dust on leaves blocks light and traps moisture — a hidden recipe for mold. Every two weeks, gently wipe leaves with a soft cloth dampened with lukewarm water. You’ll notice your plant looking fresher and the overall environment less hospitable to mold. I like to say, “The secret isn’t doing more — it’s observing better.” Spending time watching your plant reveals problems before they start and guides your care decisions.
7) Repotting — Only If Needed
Repotting unsettles roots and soils, but it’s sometimes necessary to combat mold and keep your plant thriving. Only repot if the substrate breaks down to a soggy, compacted mess, roots begin circling densely or poking out of drainage holes, or if the pot no longer drains well.
Plan repotting for early growth phases, not when the plant is stressed or blooming. When you do repot, increase pot size only modestly — about 2–5 cm larger in diameter. Remove as much old substrate as possible without damaging roots, and replace with fresh, airy mix to restore optimal conditions.
Handling roots gently and placing the plant at its previous soil depth, never deeper, helps speed recovery and limits stress, which can trigger mold issues.
8) Propagation and Renewal (If Applicable)
If your plant type allows, propagation is a great way to refresh your collection and start mold-free new growth. For many potted tropicals or orchids, the safest propagation method is division during repotting. Ensure each division includes at least 2–3 healthy pseudobulbs or root clumps to support establishment.
After propagation, maintain environmental conditions of 18–24°C temperature and a humid atmosphere around 60% RH. Avoid overwatering during this delicate stage, and use the same mold-preventing techniques described earlier. Your patience here will pay off with vigorous new plants that look and smell fresh.
Common Problems and How to Fix Them
- Yellow leaves: Usually a consequence of overwatering or insufficient light. Mold thrives in the same damp, dark conditions. Increase light exposure to 6–8 hours of bright indirect light and always allow the top 2–3 cm of soil to dry between waterings.
- Brown tips: Often signal dry air. Counter this by raising humidity to between 60–70% RH through grouping plants or using humidifiers. Avoid misting the soil surface directly, as that can worsen mold.
- No blooms: Insufficient fertilizer or light is usually to blame. Move your plant closer to a bright east or north-facing window and switch to a bloom-supporting fertilizer with a higher phosphorus ratio like 10-30-20.
- Root rot: The enemy of potted plants and a primary cause of mold outbreaks. Symptoms include mushy, blackened roots and a bad odor. If you spot root rot, unpot the plant immediately, trim damaged roots with sanitized shears, replace the substrate with fresh mix, and reduce watering frequency significantly.
- Pests: Mites and mealybugs love damp, moldy environments. Treat with weekly applications of neem oil or insecticidal soap. Improving airflow around your plant also keeps pest populations in check and reduces mold likelihood.
Seasonal Adjustments
Caring for your plant in tune with the seasons helps naturally stave off mold. In summer, warmth and longer days increase evaporation, so raise watering frequency and humidity gently with pebble trays or grouping. However, maintain good airflow to prevent mold from thriving in stagnant air.
In winter, switch gears. Water less frequently — around every 10–14 days — and pause fertilization completely. Reduce humidity slightly if your home is naturally damp, and position your plant away from cold drafts or heaters that cause rapid temperature swings. These small changes prevent mold growth in colder, slower plant phases while keeping your green companions healthy through the year.
Quick Facts — Your Key Numbers
- Light: 6–8 hours of bright indirect light (~10,000–20,000 lux).
- Watering: Weekly, when top 2–3 cm of soil is dry.
- Humidity: Maintain relative humidity between 50–70%.
- Temperature: Daytime 18–24°C, nighttime never below 13°C.
- Fertilizer: Balanced liquid fertiliser (20-20-20) diluted 1:10, applied every 3–4 weeks during growth.
- Repotting: Only when substrate breaks down or roots overflow, typically every 12–24 months.
Checklist for Success
- Ensure bright but indirect light; rotate the plant weekly for even exposure.
- Choose pots with excellent drainage and never allow water to sit at the base.
- Maintain steady humidity and encourage airflow around your plant.
- Fertilize lightly and flush the soil monthly to prevent salt buildup.
- Regularly observe roots—they should be firm, green, and healthy.
- Prune old flower spikes only when fully dry or at the correct node.
- Repot only when you see clear signs—the plant does better with stability.
Final Words of Advice
Keeping mold out of your plant’s soil isn’t about chasing perfection — it’s about developing a consistent, mindful routine. Every plant responds uniquely to care, and you’ll learn to interpret its signals with quiet observation and patience. Remember: even the most experienced gardeners have faced stubborn mold outbreaks. It’s part of the journey, not a failure. Approach your plant like a partner rather than a project, and over time, you’ll find that healthy soil, clear roots, and mold-free pots come naturally. Every plant you nurture teaches patience — and rewards you with the quiet joy of lush, thriving growth. Stay curious, stay observant, and enjoy every step of your care journey.

Hi there — I’m Ava, the creator behind Ava Garden Tips 🌿
I’ve always been passionate about plants, flowers, and the simple joy that comes from growing something beautiful. What started as a small balcony garden has turned into a love for helping others create their own green spaces — no matter how big or small.