
Introduction
Caring for aloe vera in your home or balcony pot isn’t just about nurturing a plant; it’s about cultivating a resilient, striking companion that offers beauty, practical uses, and effortless charm. Aloe vera is famously forgiving, but thriving with lush, plump leaves and avoiding common pitfalls requires more than occasional watering. With the right soil mix and attentive care, you’ll watch your aloe grow steadily, produce offsets to share, and maintain its rich green hue year-round. Success isn’t reserved for greenhouse owners — all you really need is consistency, observation, and a hands-on approach. Let’s walk through every essential step together to help you master the art of aloe vera care right where you live.
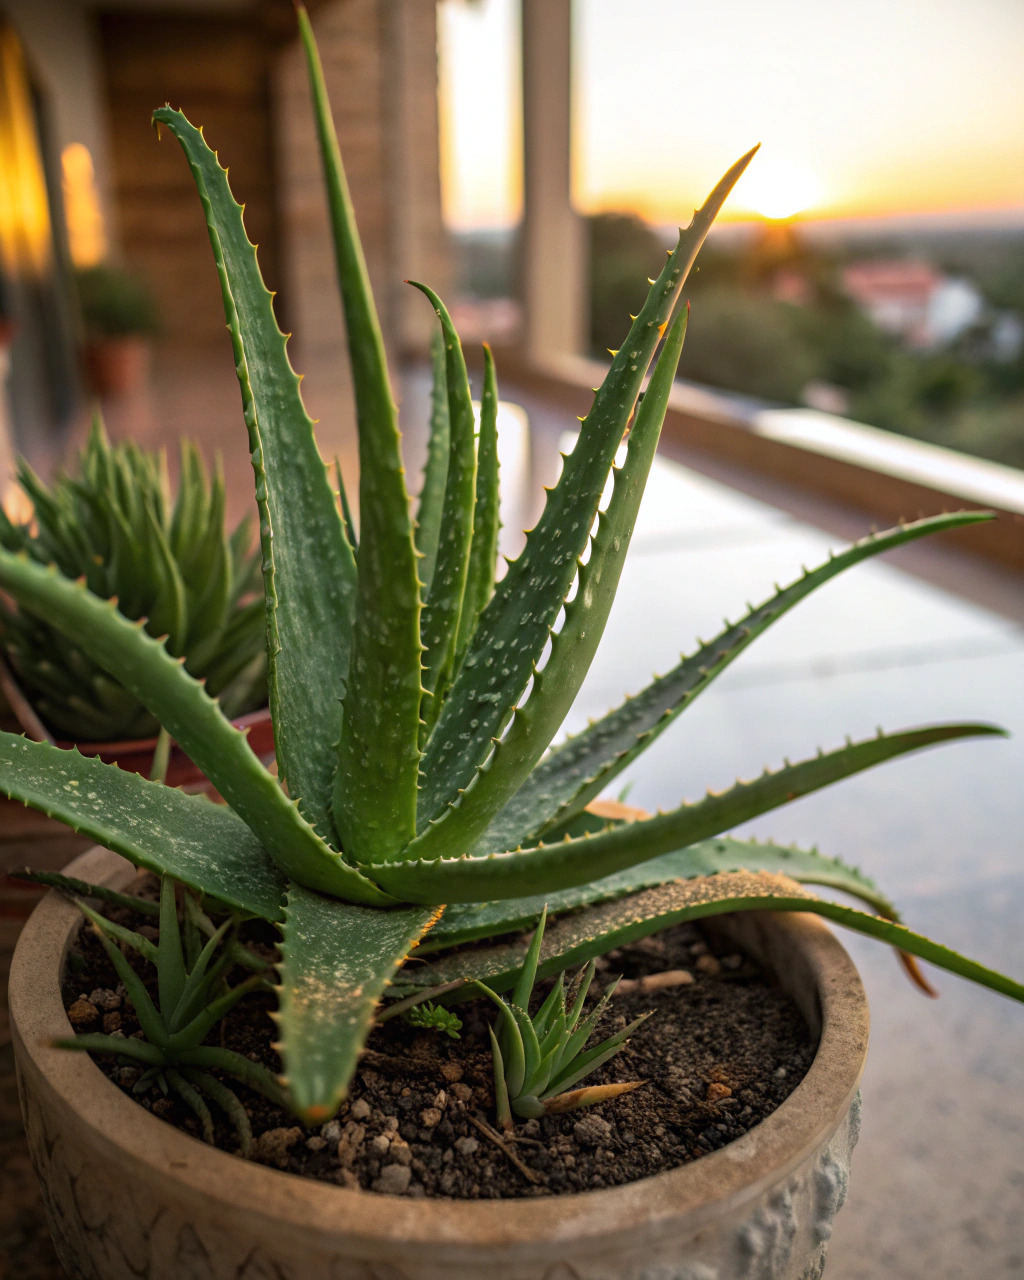
Preparing the Perfect Setup
Before you pot your aloe vera plant, preparing its home is the first decisive step. You’ll need a few essentials that work together to create just the right environment: a pot that respects the plant’s roots, a substrate that drains well yet holds a little moisture, and an understanding of the ideal light, temperature, humidity, and feeding requirements. Here’s what you’ll want to gather:
- Pot: Choose a container with a diameter roughly 10–15 cm wider than the plant’s root ball. Drainage holes are non-negotiable — aloe roots hate sitting in water, which leads quickly to rot. Terracotta or clay pots are excellent, especially if your balcony or indoor space tends to be warm, as these materials naturally wick away excess moisture and keep roots cooler.
- Substrate: Aloe vera thrives in a fast-draining, mineral-rich mix. A well-balanced blend is 50% coarse sand or perlite to boost drainage, 25% organic compost or potting mix for nutrients, and 25% coarse grit or small bark chips to improve aeration. The ideal pH falls between 5.5 and 6.5, mildly acidic but close to neutral — too acidic or alkaline can hamper nutrient uptake. Avoid dense, moisture-retentive soils at all costs.
- Light: Provide bright, indirect sunlight for roughly 6–8 hours daily, aiming for a light intensity of roughly 10,000–20,000 lux. East-facing windows are perfect because they offer morning sun that’s gentle yet bright. If needed, a sheer curtain is your best friend to diffuse harsh midday rays, preventing leaf scorch.
- Humidity: Aloe vera prefers dry to moderate humidity levels, roughly 50–70% relative humidity. If your home is particularly dry, you can increase humidity gently with pebble trays or grouping plants together, but avoid excessive moisture which can promote fungal growth on the leaves and roots.
- Temperature: Keep daytime temperatures within a comfortable range of 18–24°C (65–75°F), and avoid dropping below 13°C (55°F) at night. Aloe prefers steady warmth without chilly drafts or sudden cold snaps that stress the plant.
- Fertilizer: Feed your aloe with a balanced liquid fertilizer like 20-20-20 at a dilution ratio of 1:10, so it’s gentle but effective. Apply every 3–4 weeks during the growing season, roughly spring through early fall, and avoid feeding during winter dormancy.
Step-by-Step Care Routine
1) Understanding the Plant’s Cycle
Aloe vera has distinct phases throughout the year: a vigorous growth period in spring and summer and a slower, more restful phase during autumn and winter. You’ll notice new leaves pushing out actively during warm months, while cooler months bring a quieting of growth. This cycle isn’t just a natural rhythm — it’s critical for the plant’s health. Think of it this way: when aloe is resting, it’s gathering energy deep in its leaves to fuel the next growth surge.
Early in my experience, I used to water daily, thinking more moisture could speed growth after a long winter. The result? Wilted, yellowing leaves and an almost immediate risk of root rot. That experience taught me the power of aligning care to growth cycles — less water and no fertilizer during the rest phase, more warmth and consistent hydration when growing actively.
2) The Right Pot and Substrate
When selecting a pot or checking if your aloe needs repotting, look closely at the roots. Are the roots circling the edges or pushing through drainage holes? Is the soil compacted, holding onto moisture or smelling sour? If yes, it’s repotting time. But if roots are firm, white or pale green, and the substrate smells fresh and drains quickly, hold off for now. Aloe likes its roots somewhat snug—forcing a repot too often can disrupt that balance.
Touch the substrate; it should feel lofty and gritty, not dense or clay-like. This airy texture ensures oxygen reaches the roots, keeping them healthy. Many beginners make the mistake of using regular potting soil, which might hold too much water, leading directly to root suffocation and fungal issues.
3) Watering the Smart Way
Water deeply and infrequently—this is the mantra. Give your aloe a thorough soak until water flows through the bottom, then let it drain completely. Your guiding gauge is the dryness of the substrate’s top 2–3 cm. Only water once that layer feels dry to the touch. In practice, this often translates to watering about once a week during summer and less frequently in winter, perhaps every 10–14 days.
Always use lukewarm, soft water if possible—it feels gentle on roots, mimicking natural rainwater. Avoid cold tap water as it can shock roots. After watering, use a “weight test”—lift the pot to feel its heaviness. Water again only once the pot feels noticeably lighter; this intuitive test prevents overwatering, a common killer of aloes.
4) Light, Temperature, and Humidity Balance
Aloe vera thrives in bright indirect light, ideally around 6–8 hours daily. Placing it near an east-facing window brings gentle morning sun that invigorates leaves while minimizing leaf burn. Rotate the pot weekly to ensure even exposure and symmetrical growth. Excessive direct sunlight can cause leaf tips to brown or wrinkle, while too little light results in a stretched, leggy plant.
Maintain indoor temperatures around 18–24°C during the day and above 13°C at night. Aloe doesn’t tolerate drafts or sudden temperature drops, so keep it away from cold windowsills or vents. Although aloe prefers dryer air, keeping humidity near 60% helps prevent leaf shriveling—simple tricks like placing the pot on a pebble tray filled with water or grouping nearby plants can raise humidity without saturating the air.
When your leaves start yellowing at the tips or wrinkling, it’s often a cue the plant is stressed from too much sun or inconsistent watering. Adjust placement or watering rhythm promptly to see recovery.
5) Feeding and Fertilization
To keep your aloe healthy and lush, feed it during its active growing phase with a balanced fertilizer such as 20-20-20. Dilute it at a ratio of 1:10 before applying, which prevents overfeeding stress. Apply this feeding once every 3–4 weeks from early spring through late summer.
Stop fertilizing altogether during fall and winter — its resting phase. Over-fertilizing manifests as a white crust around the pot rim or substrate surface, a sign salts are accumulating. To prevent that, flush your pot monthly by watering with plain water, allowing it to drain freely and wash away excess fertilizer minerals.
If you notice pale or dull leaves, that’s often a nitrogen deficiency signaling a need for more feeding. Conversely, white residue or slower growth points to too much fertilizer.
6) Pruning, Cleaning, and Post-Bloom Maintenance
Pruning aloe vera is simple but essential to maintaining appearance and health. When offsets or “pups” crowd the main plant, they can be separated, but for leaf care, remove any damaged or dried leaves by cutting close to the base using clean, sharp scissors.
Cleaning leaves biweekly with a soft, damp cloth removes dust and allows the plant to photosynthesize efficiently. Always sanitize your pruning tools with isopropyl alcohol before and after use to prevent spreading disease.
As I often say, “The secret isn’t doing more — it’s observing better.” Watch your plant—health shows in leaf color, texture, root firmness—and respond gently but decisively.
7) Repotting — Only If Needed
Resist the urge to repot your aloe unless you really see the need. Look closely: if roots are pot-bound, circling tightly, or the substrate breaks down into a soggy mass, that’s your cue. Also, if drainage slows or water pools on the surface, refresh the potting medium.
When repotting, increase pot size by only 2–5 cm in diameter to avoid excess soil moisture that encourages root rot. Gently tease apart roots if tightly entwined and plant in fresh, well-draining substrate. Remember, aloe tolerates root crowding better than soggy soil.
8) Propagation and Renewal (If Applicable)
Propagating aloe vera is straightforward and rewarding. The easiest method is division by separating offsets or “pups” that grow around the base of the mother plant. Wait until pups are at least 10 cm tall with a few roots of their own.
Carefully separate pups using a clean knife or gently pull them free, ensuring each has roots attached. Plant them immediately in a similar well-draining soil mix. Keep the new plants at a steady temperature of 18–24°C and humidity around 60% until they establish, watering sparingly but consistently.
Common Problems and How to Fix Them
- Yellow leaves: Typically caused by overwatering or insufficient light. Increase exposure to bright indirect light to 6–8 hours, and let the soil dry out completely between waterings.
- Brown tips: Signs of dry air or inconsistent watering. Raise humidity to 60–70% using trays or grouping and ensure even watering routines.
- No blooms: Aloe rarely blooms indoors, but if expected, lack of light or nutrients is a culprit. Move the plant closer to a bright window and switch to a bloom-supporting fertilizer, such as a 10-30-20 formula, during active growth phases.
- Root rot: Soggy substrate or poor drainage usually leads to this. Unpot your aloe and trim off any blackened or mushy roots. Repot in fresh, dry substrate with excellent drainage, and reduce watering frequency.
- Pests: Aloe can attract mealybugs, aphids, and spider mites. Treat infestations weekly with neem oil or insecticidal soap. Improve airflow around the plant to discourage pest development.
Seasonal Adjustments
Your aloe’s needs adapt subtly across the seasons. In summer, the plant grows more vigorously and will benefit from slightly higher humidity—top up moisture by misting or pebble trays and increase watering to once a week or when dry. Fertilize regularly during this time.
Come winter, slow growth means reduce watering frequency to every 10–14 days, pause fertilization, and keep the aloe away from chilly drafts or direct exposure to cold windows. Small tweaks ensure the plant remains stable, healthy, and ready to burst into growth as warmer months return.
Quick Facts — Your Key Numbers
- Light: 6–8 hours bright, indirect (10,000–20,000 lux).
- Watering: Deeply once weekly; only when top 2–3 cm of soil is dry.
- Humidity: 50–70% relative humidity (RH).
- Temperature: Daytime 18–24°C (65–75°F), night above 13°C (55°F).
- Fertilizer: Balanced 20-20-20 liquid formula, diluted 1:10, every 3–4 weeks.
- Repotting: Only when substrate degrades or roots overflow, generally every 12–24 months.
Checklist for Success
- Offer bright but indirect light; rotate pot weekly for even growth.
- Use well-draining pots and substrate; never allow water to pool.
- Maintain stable humidity and airflow around the plant.
- Feed lightly and regularly during growth; flush with water monthly.
- Observe root health — expect firm, pale green roots.
- Prune old leaves and pups cautiously, sanitizing tools first.
- Repot strictly as needed, avoiding big pot size jumps.
Final Words of Advice
Growing aloe vera is a journey of attentive care, less about perfect conditions and more about consistency and keen observation. Your plant responds beautifully to quiet attention and thoughtful adjustments. Every leaf tells a story — when you learn to listen, your aloe rewards you with bold growth and enduring vitality. Remember, aloe vera thrives in the hands of those who treat it as both a living organism and a companion. Start small, adjust carefully, and watch as your aloe becomes a steadfast presence on your window ledge or balcony. Your care will turn this timeless succulent into a constant reminder that patience and mindfulness in gardening bring their own quiet joys.

Hi there — I’m Ava, the creator behind Ava Garden Tips 🌿
I’ve always been passionate about plants, flowers, and the simple joy that comes from growing something beautiful. What started as a small balcony garden has turned into a love for helping others create their own green spaces — no matter how big or small.