
Introduction
Orchids have an extraordinary way of transforming any space with their elegant, long-lasting blooms and delicate foliage. Caring for these exotic beauties in pots at home or on your balcony might seem intimidating at first, but the truth is, your orchid thrives with simple, consistent care tuned to its unique needs. In this guide, you’ll gain a practical, step-by-step fertilizer schedule paired with essential care tips, helping you unlock vibrant blooms year after year. No greenhouse required, just an observant eye and a willingness to nurture these fascinating plants.
Preparing the Perfect Setup
Before you even approach fertilization, setting the right environment is key to your orchid’s success. You’ll need to assemble a few critical items that support healthy roots, control moisture, and provide the right nutrients. Let’s walk through what your orchid’s home should look like.
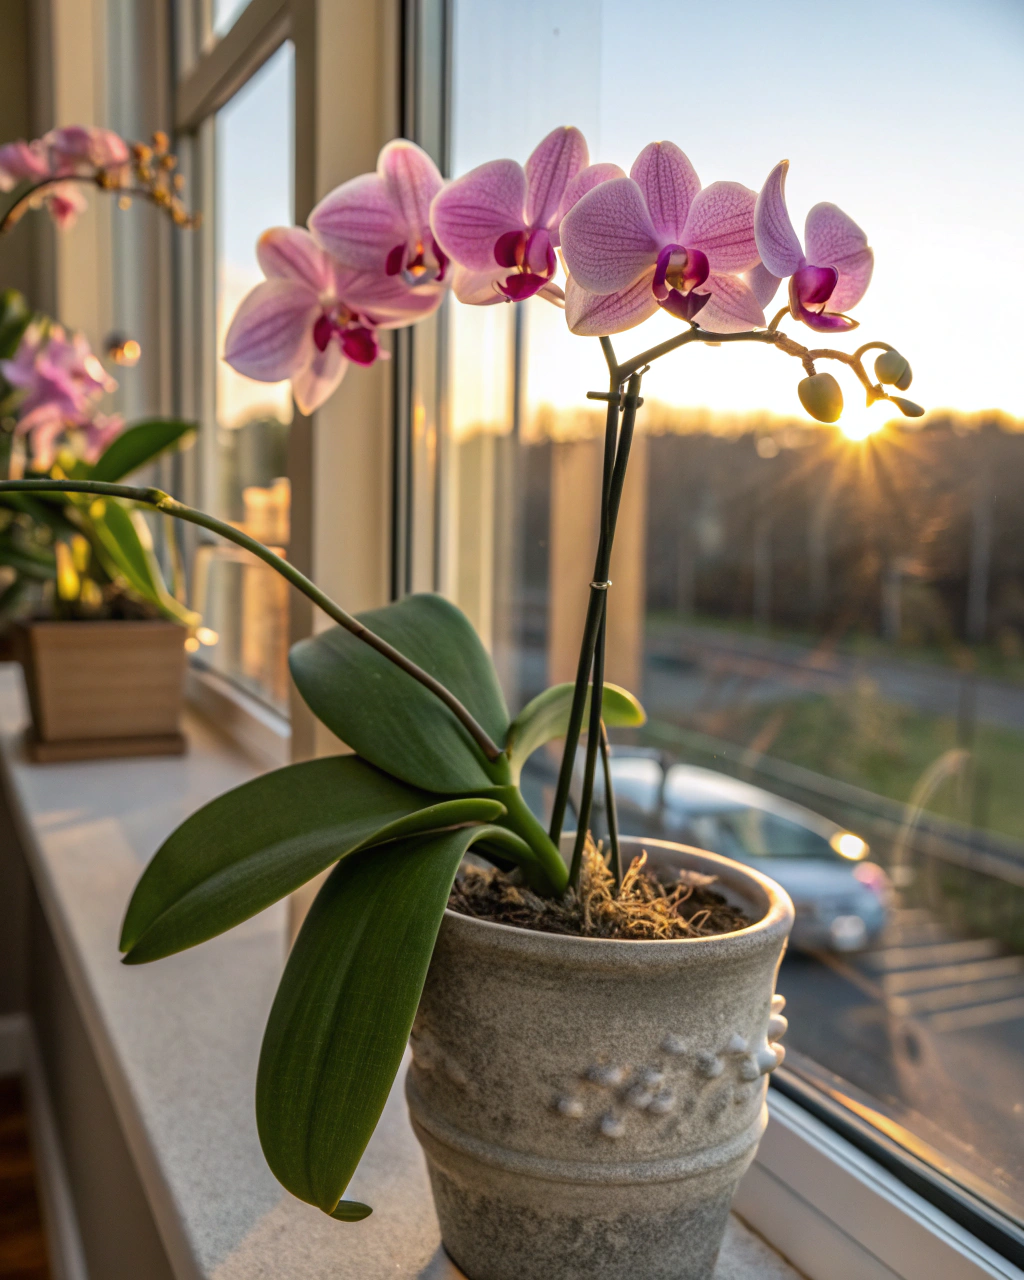
- Pot: Choose a container with a diameter that comfortably holds your orchid’s roots without crowding—usually just a little bigger than the root mass. Most orchids appreciate pots with plenty of drainage holes. Avoid any pot that lets water sit under the root ball, as stagnant moisture invites root rot. If your balcony or room tends to run hot, prefer clay pots; their porous nature allows excess heat to dissipate, keeping roots cooler.
- Substrate: Orchids are epiphytes, meaning their roots are designed to breathe rather than stay soggy. Use a species-specific mix such as coarse bark, perlite, and sphagnum moss in a predefined balance—generally around 70% bark, 15% perlite, and 15% moss works well. This creates an airy, fast-draining medium that mimics their natural canopy habitat. Aim for a slightly acidic pH, ideally between 5.5 and 6.5, which benefits nutrient uptake.
- Light: Orchids thrive with 6 to 8 hours of bright but indirect light daily, sitting comfortably within a range of 10,000 to 20,000 lux. Direct strong sun, especially in the afternoon, can scorch leaves, so a sheer curtain is your best friend to diffuse harsh rays without dimming the plant’s energy supply.
- Humidity: These tropical natives demand a higher humidity level to flourish—shoot for 50 to 70% relative humidity. You can achieve this with simple tools—a humidity tray filled with water and pebbles, grouping orchids together to create a microclimate, or investing in a small humidifier. The benefit? Healthy leaves, vibrant flowers, and roots that don’t dry out prematurely.
- Temperature: Daytime temperatures between 18–24°C (65–75°F) suit most common orchids. Nighttime should not dip below 13°C (55°F), mimicking natural tropical evenings. Sudden cold drafts can shock your plant, so keep it cozy but not overheated.
- Fertilizer: Start with a balanced liquid fertilizer—ideally 20-20-20. Dilute it at a 1:10 ratio (one part fertilizer to ten parts water) and plan to apply this every 3–4 weeks. This ratio maintains nutrient balance without overfeeding, which can burn roots or cause excess salt buildup.
Step-by-Step Care Routine
1) Understanding the Plant’s Cycle
Your orchid’s care needs naturally ebb and flow with its life cycle. After the proud spectacle of blooming, your orchid enters a recovery phase. During this time, it focuses on root and leaf strengthening—essential to support its next flowering. Watering and feeding routines should be gentler here to avoid stress. From experience, I learned this the hard way: I once kept watering weekly after blooming, thinking extra moisture would fuel growth, but the roots started drowning, and rot set in. Now I let the plant’s cues guide me, watering less and reducing fertilizer until new green shoots and healthy roots suggest it’s ready for more attention. This rhythm sets the stage for spectacular, repeat blooms.
2) The Right Pot and Substrate
The comfort of your orchid’s roots matters tremendously. Check every 12 to 18 months if your orchid needs repotting. You’ll know it’s time when the bark substrate looks decomposed, turning soft and compacted, or when roots overflow the current pot—crowding restricts air circulation and water drainage. If the roots feel firm and white-green, and the media smells fresh, it’s fine to stay put.
The ideal substrate will feel lightweight, rough, and dry rather than heavy or garden-soil dense. Avoid typical potting soil at all costs—orchids aren’t earthbound and will suffer suffocation and root rot in dense, moisture-holding media. When repotting, gently loosen the root mass and replace the old substrate entirely to keep the airiness that orchids need.
3) Watering the Smart Way
Watering your orchid properly can feel like a fine art, but luckily it’s straightforward once you know what to listen for. Usually, watering once a week is enough, but the gold standard is to check the top 2–3 cm of your substrate. If it feels dry to the touch, it’s time to water. Use lukewarm or room temperature, soft water—rain, distilled, or filtered water is ideal to avoid buildup of salts and minerals that tap water often contains.
When you water, soak the pot thoroughly so the roots get a steady drink, then let all excess water drain out completely—standing water leads to root rot. One trick is to pick up the pot before and after watering; you’ll feel it heavier when wet and lighter when dry. This weight test will become your best intuition gauge.
In cooler months or high-humidity seasons, reduce watering frequency—orchids require less moisture then. Conversely, on hot, dry days, especially during summer, increase watering to keep roots from drying out.
4) Light, Temperature, and Humidity Balance
Orchids live at the intersection of light, warmth, and humidity. Striking the right balance supports healthy leaf texture and vivid flowers. Choose an east-facing window if possible, where your orchid receives bright but indirect morning light. Rotate your plant by a quarter turn every week to prevent uneven growth or leaf shading.
Keep daytime temperatures steady between 18 and 24°C and nights above 13°C. If temperatures drop suddenly or when drafts sneak in, watch closely—your orchid may show stress with curling or wrinkling leaves.
Humidity around 60% creates an oasis where roots absorb moisture and air without becoming waterlogged. If you see edges turning yellow or tip-browning, or leaves wrinkling, these could be clues that humidity or temperature needs adjusting. Quickly raising humidity with a watering tray or humidifier often reverses the problem.
5) Feeding and Fertilization
Nutrition is a cornerstone of orchid vigor, and feeding right ensures spectacular blooms and lush foliage. Use a balanced liquid fertilizer labeled 20-20-20, which supplies equal parts nitrogen, phosphorus, and potassium—the trio that promotes leaf development, root strengthening, and flower production.
Dilute it at a 1:10 ratio, meaning one part fertilizer to ten parts water. Apply this solution every 3–4 weeks during the active growing season, typically spring through early fall. Pause fertilizing during winter months when growth naturally slows to avoid overwhelming the plant.
Watch your orchid’s leaves for signs of feeding imbalance. Pale, chlorotic leaves often signal nitrogen deficiency, while a white crust on the substrate surface is a classic warning of fertilizer salt buildup. To prevent this, flush your pot monthly with clear lukewarm water, letting it drain well. This simple step dissolves and removes excess salts, protecting delicate roots.
6) Pruning, Cleaning, and Post-Bloom Maintenance
When your orchid finishes blooming, it’s time for careful pruning and upkeep. Inspect flower spikes: if green, trim about 1 cm above a node to encourage a potential secondary bloom. If the spike has turned brown or yellow, cut it back flush at the base to redirect the plant’s energy toward healthy growth.
Clean the leaves every two weeks using a soft, damp cloth to remove dust buildup. This clears the stomata, important for gas exchange, and also keeps the plant looking fresh. Always sanitize your pruning shears between cuts with rubbing alcohol—this prevents disease spread from one plant to another.
As I’ve often said, “The secret isn’t doing more—it’s observing better.” Taking time to notice subtle plant signals guides you in knowing when to prune or clean, enhancing your orchid’s longevity.
7) Repotting — Only If Needed
Repotting orchids is sometimes necessary but should never be a routine task unless conditions demand it. You want to repot when you see roots circling the pot tightly, substrate has decomposed and lost its structure, or drainage is compromised and water isn’t moving through well.
Plan your repotting during early spring or when new root growth kicks in to help the plant recover more swiftly. Increase pot size cautiously—no more than 2–5 cm wider—to maintain good moisture control and avoid excess substrate holding water.
During repotting, gently remove old bark from roots, trim any dead or mushy roots, and settle the roots carefully into fresh substrate. A gentle hand here protects delicate root hairs essential for nutrient uptake.
8) Propagation and Renewal (If Applicable)
If you’re interested in creating new orchid plants, division is the safest method and best done at repotting time. Carefully divide your orchid so that each section has at least 2–3 pseudobulbs—these are the thickened stems that store energy. Ensure your cut is clean and the divisions have healthy roots.
Keep newly divided orchids at 18–24°C with 60% humidity and reduced fertilizer for the initial weeks. This gentle care encourages new root and leaf development without overwhelming the fresh divisions.
Common Problems and How to Fix Them
- Yellow leaves: This usually points to overwatering or inadequate light. Adjust by increasing bright indirect light exposure to 6–8 hours daily, and ensure the top substrate layer dries before watering again.
- Brown tips: Often a sign of dry air. Raise ambient humidity to around 60–70% using trays, grouping plants, or a humidifier.
- No blooms: Insufficient light or nutrient imbalance can withhold flower production. Move your orchid to a brighter spot near a window and switch to a bloom-specific fertilizer like 10-30-20 to encourage flowering.
- Root rot: Resulting from soggy substrate or poor drainage. Carefully unpot your orchid, prune away mushy or blackened roots, replace the substrate with fresh mix, and reduce watering frequency.
- Pests: Mealybugs, spider mites, and scale can congregate on orchids in dry or stagnant air conditions. Treat affected plants weekly with neem oil or insecticidal soap, and improve airflow nearby to prevent infestations.
Seasonal Adjustments
Orchids appreciate steady care, but their needs shift subtly through the year. In summer, when days are longer and warmer, increase watering frequency and humidity—your orchid will be actively growing and thirsty. From late fall to winter, reduce watering to roughly every 10–14 days, and pause fertilizer applications to help the plant rest. Avoid placing orchids near cold drafts or heating vents, as sudden temperature swings can cause stress. These small adjustments will keep your orchid balanced and thriving through seasonal changes.
Quick Facts — Your Key Numbers
- Light: 6–8 hours bright indirect light, equivalent to 10,000–20,000 lux.
- Watering: Thoroughly once weekly; potting medium’s top 2–3 cm should be dry before watering.
- Humidity: Maintain between 50–70% relative humidity (RH).
- Temperature: Day between 18–24°C, night above 13°C.
- Fertilizer: Use a balanced 20-20-20 liquid fertilizer diluted at 1:10, every 3–4 weeks.
- Repotting: Only when bark breaks down or roots overflow, usually every 12–24 months.
Checklist for Success
- Ensure bright but indirect light; remember to rotate plants weekly for even growth.
- Use containers with excellent drainage; never allow water to collect at the base.
- Maintain consistent humidity and fresh airflow to prevent stress and pests.
- Feed lightly but regularly and flush pots monthly to avoid salt buildup.
- Keep an eye on root health—look for firm, green roots, not shriveled or brown.
- Cut back old flower spikes only once fully dry or at the appropriate node.
- Repot strictly when substrate breakdown or root crowding demands it, not on a fixed schedule.
Final Words of Advice
Remember, growing orchids is less about perfection and more about gentle persistence. Your success will come from observing and responding thoughtfully, rather than rushing procedures. Orchids communicate through subtle cues—the curve of a leaf, the texture of roots, the timing of blooms—and learning to read these signals leads to a deeply satisfying gardening journey. As I often remind growers, “Every orchid teaches patience—it rewards quiet observation with spectacular blooms.” Keep nurturing your orchid with kindness and consistency, and it will unfailingly gift you its unique beauty season after season.

Hi there — I’m Ava, the creator behind Ava Garden Tips 🌿
I’ve always been passionate about plants, flowers, and the simple joy that comes from growing something beautiful. What started as a small balcony garden has turned into a love for helping others create their own green spaces — no matter how big or small.